

Contents
You're launching your first app, or maybe it's been a while since the last time. Submitting an app to the App Store isn't as simple as pushing a launch button, but it's not as complicated as it may seem either.
This step-by-step post assumes that you are already enrolled in the Apple Developer Program, your app follows Apple's App Review and Human Interface Guidelines, and you're ready to ship. It's an update of Gustavo Ambrozio and Tony Dahbura's awesome guide, with info from the latest version of Xcode that streamlines some of the steps and further context from Apple's own documentation. Here's what to do in order to distribute your app for beta testing or to go live in the App Store.
Ensure completeness and functionality
Apple places a strong emphasis on app quality and user experience, making it crucial to ensure that your app is complete and fully functional before submitting your app to the App Store. Make sure all features described in your app metadata are fully implemented and working as intended. Remove any placeholder content, empty views, or debugging information. Remember, a well-polished app not only increases your chances of approval but also sets the foundation for positive user reviews and ratings.
Test thoroughly and optimize performance
Conduct extensive testing to ensure your app runs smoothly and efficiently before submission to give it the best chance to climb the App Store's rankings. Pay special attention to overall stability, app launch times, and UI responsiveness, and use performance monitoring tools to identify and resolve any memory leaks, excessive CPU usage, or battery drain issues. A high-performing app not only meets Apple's standards but also provides a superior user experience, leading to better retention and user satisfaction.
Maintain Data Privacy and Security
Apple famously has stringent requirements for privacy and security, and your app must comply with them. Clearly communicate your app's data collection and usage practices in your privacy policy and implement proper data encryption for any sensitive information transmitted or stored by your app. If your app uses features like camera, microphone, or location services, ensure you request user permission appropriately and provide clear explanations for their usage. Adhering to these standards not only helps in getting your app approved but also builds trust with your users and aligns with Apple's commitment to user privacy.
The development provisioning profile and development certificate that you've been using are only for specific devices. In order to distribute your app to beta testers or to users through the App Store, you'll need a separate distribution provisioning profile and distribution certificate.
The easiest way to do this is through Xcode. If automatic signing is enabled, Xcode will create and manage certificates, signing identities, and handle device registration for you. If automatic signing is already enabled or if you don't need help with signing, you can skip to step two.
(In some cases, you might prefer manual signing. Here's an in-depth tutorial on how to manually sign your app. Keep in mind that all targets in a bundle should use the same signing method.)
- First, add your Developer Program account to Xcode if you haven't already. From the top menu, select Xcode, then choose Preferences.
- Click on Accounts. In the bottom left corner of the window, press the + sign, then Add Apple ID...
- Enter the Apple ID and password you use for the Apple Developer Program, then click Sign In.
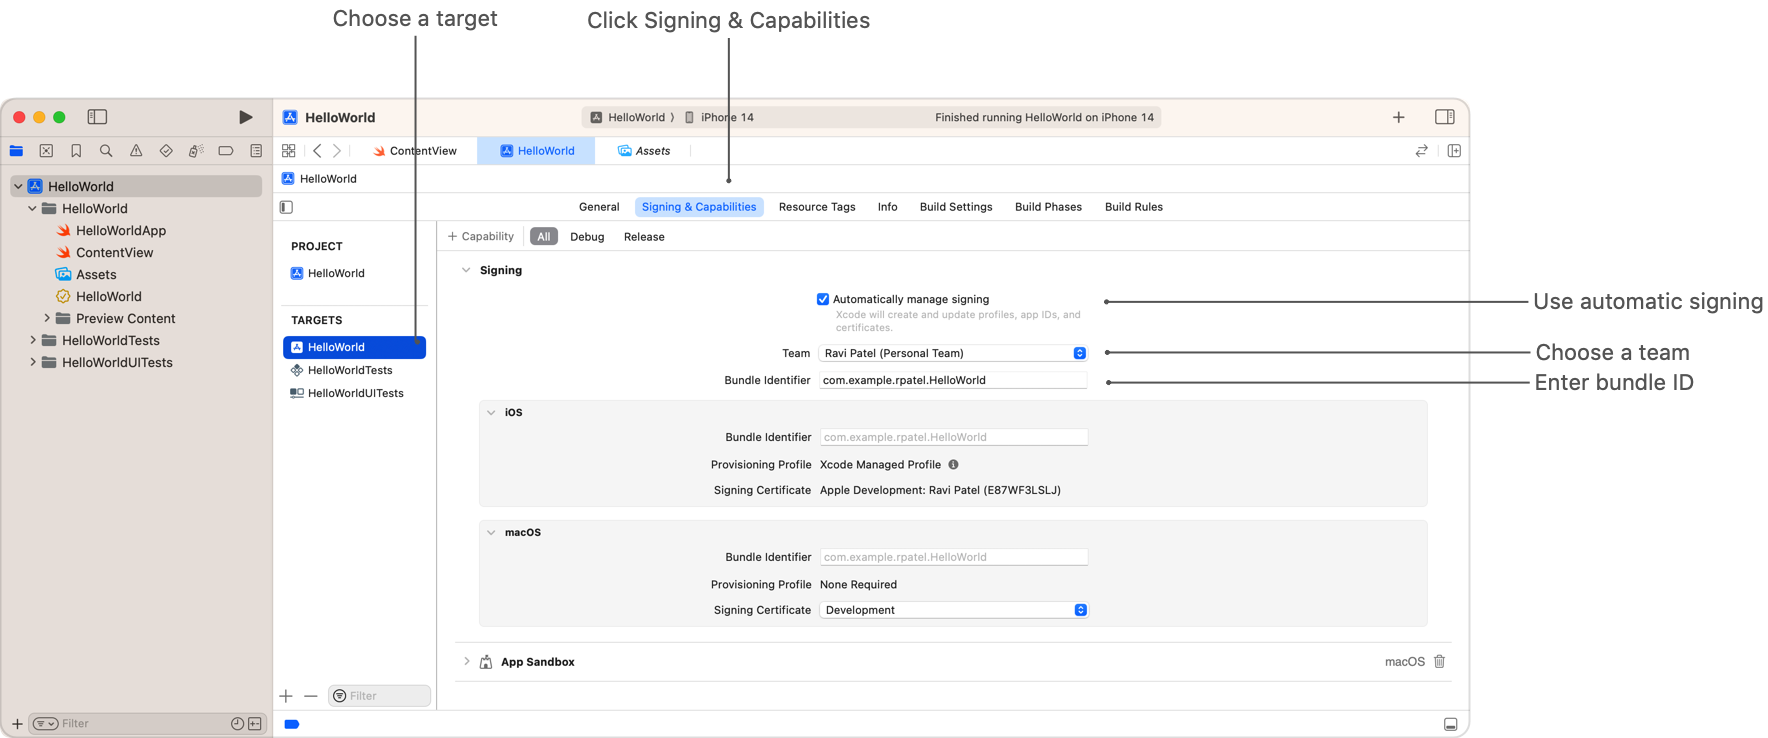
- Next, enable automatic signing. From the Project Editor, choose a target and select Signing & Capabilities.
- Click on the box to Automatically manage signing. Select your team.
When you connect a new device to your Mac, Xcode will automatically detect and register it to your team provisioning profile. Note that in order to launch your app on a device, the device needs to be registered on your team provisioning profile.
Get an App Store Connect account by:
- Creating your own App Store Connect organization and being the team agent. Sign in with the Apple ID you used to enroll in the Apple Developer Program
- Or being invited by an existing organization as a user with an Admin, Technical, or App Manager role. Read more details about App Store Connect user accounts here.
For paid apps
If you're submitting a paid app, you'll need to sign a contract that covers the terms of payment. If your app is free, you can skip ahead.
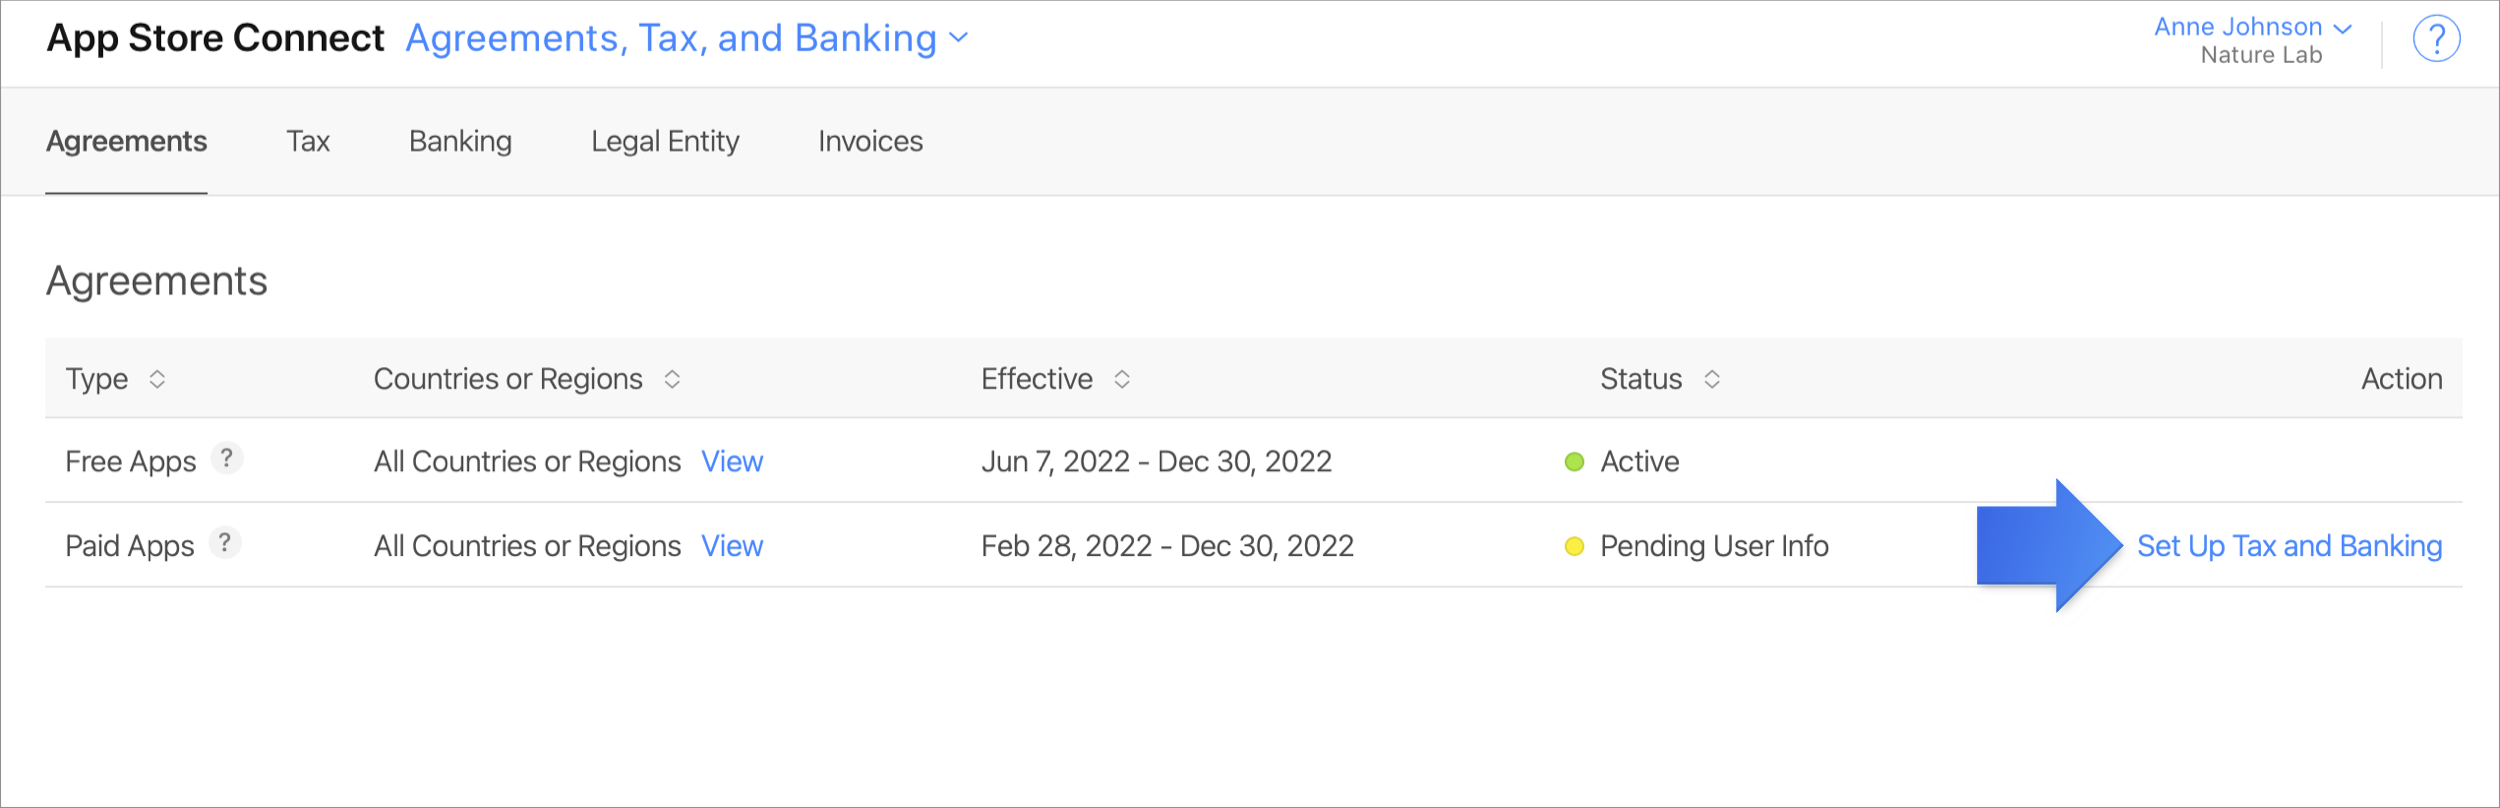
Click on Agreements, Tax, and Banking on the App Store Connect dashboard.
From the "Paid Apps" row, select View and Agree to Terms from the actions column.
Review the agreement that appears, check the box to agree to the terms, and select Agree.
Now, select the available action in the paid apps row, which will change to Set Up Tax and Banking.
This will take you to the paid apps agreement page; click on Add Bank Account and enter your information.
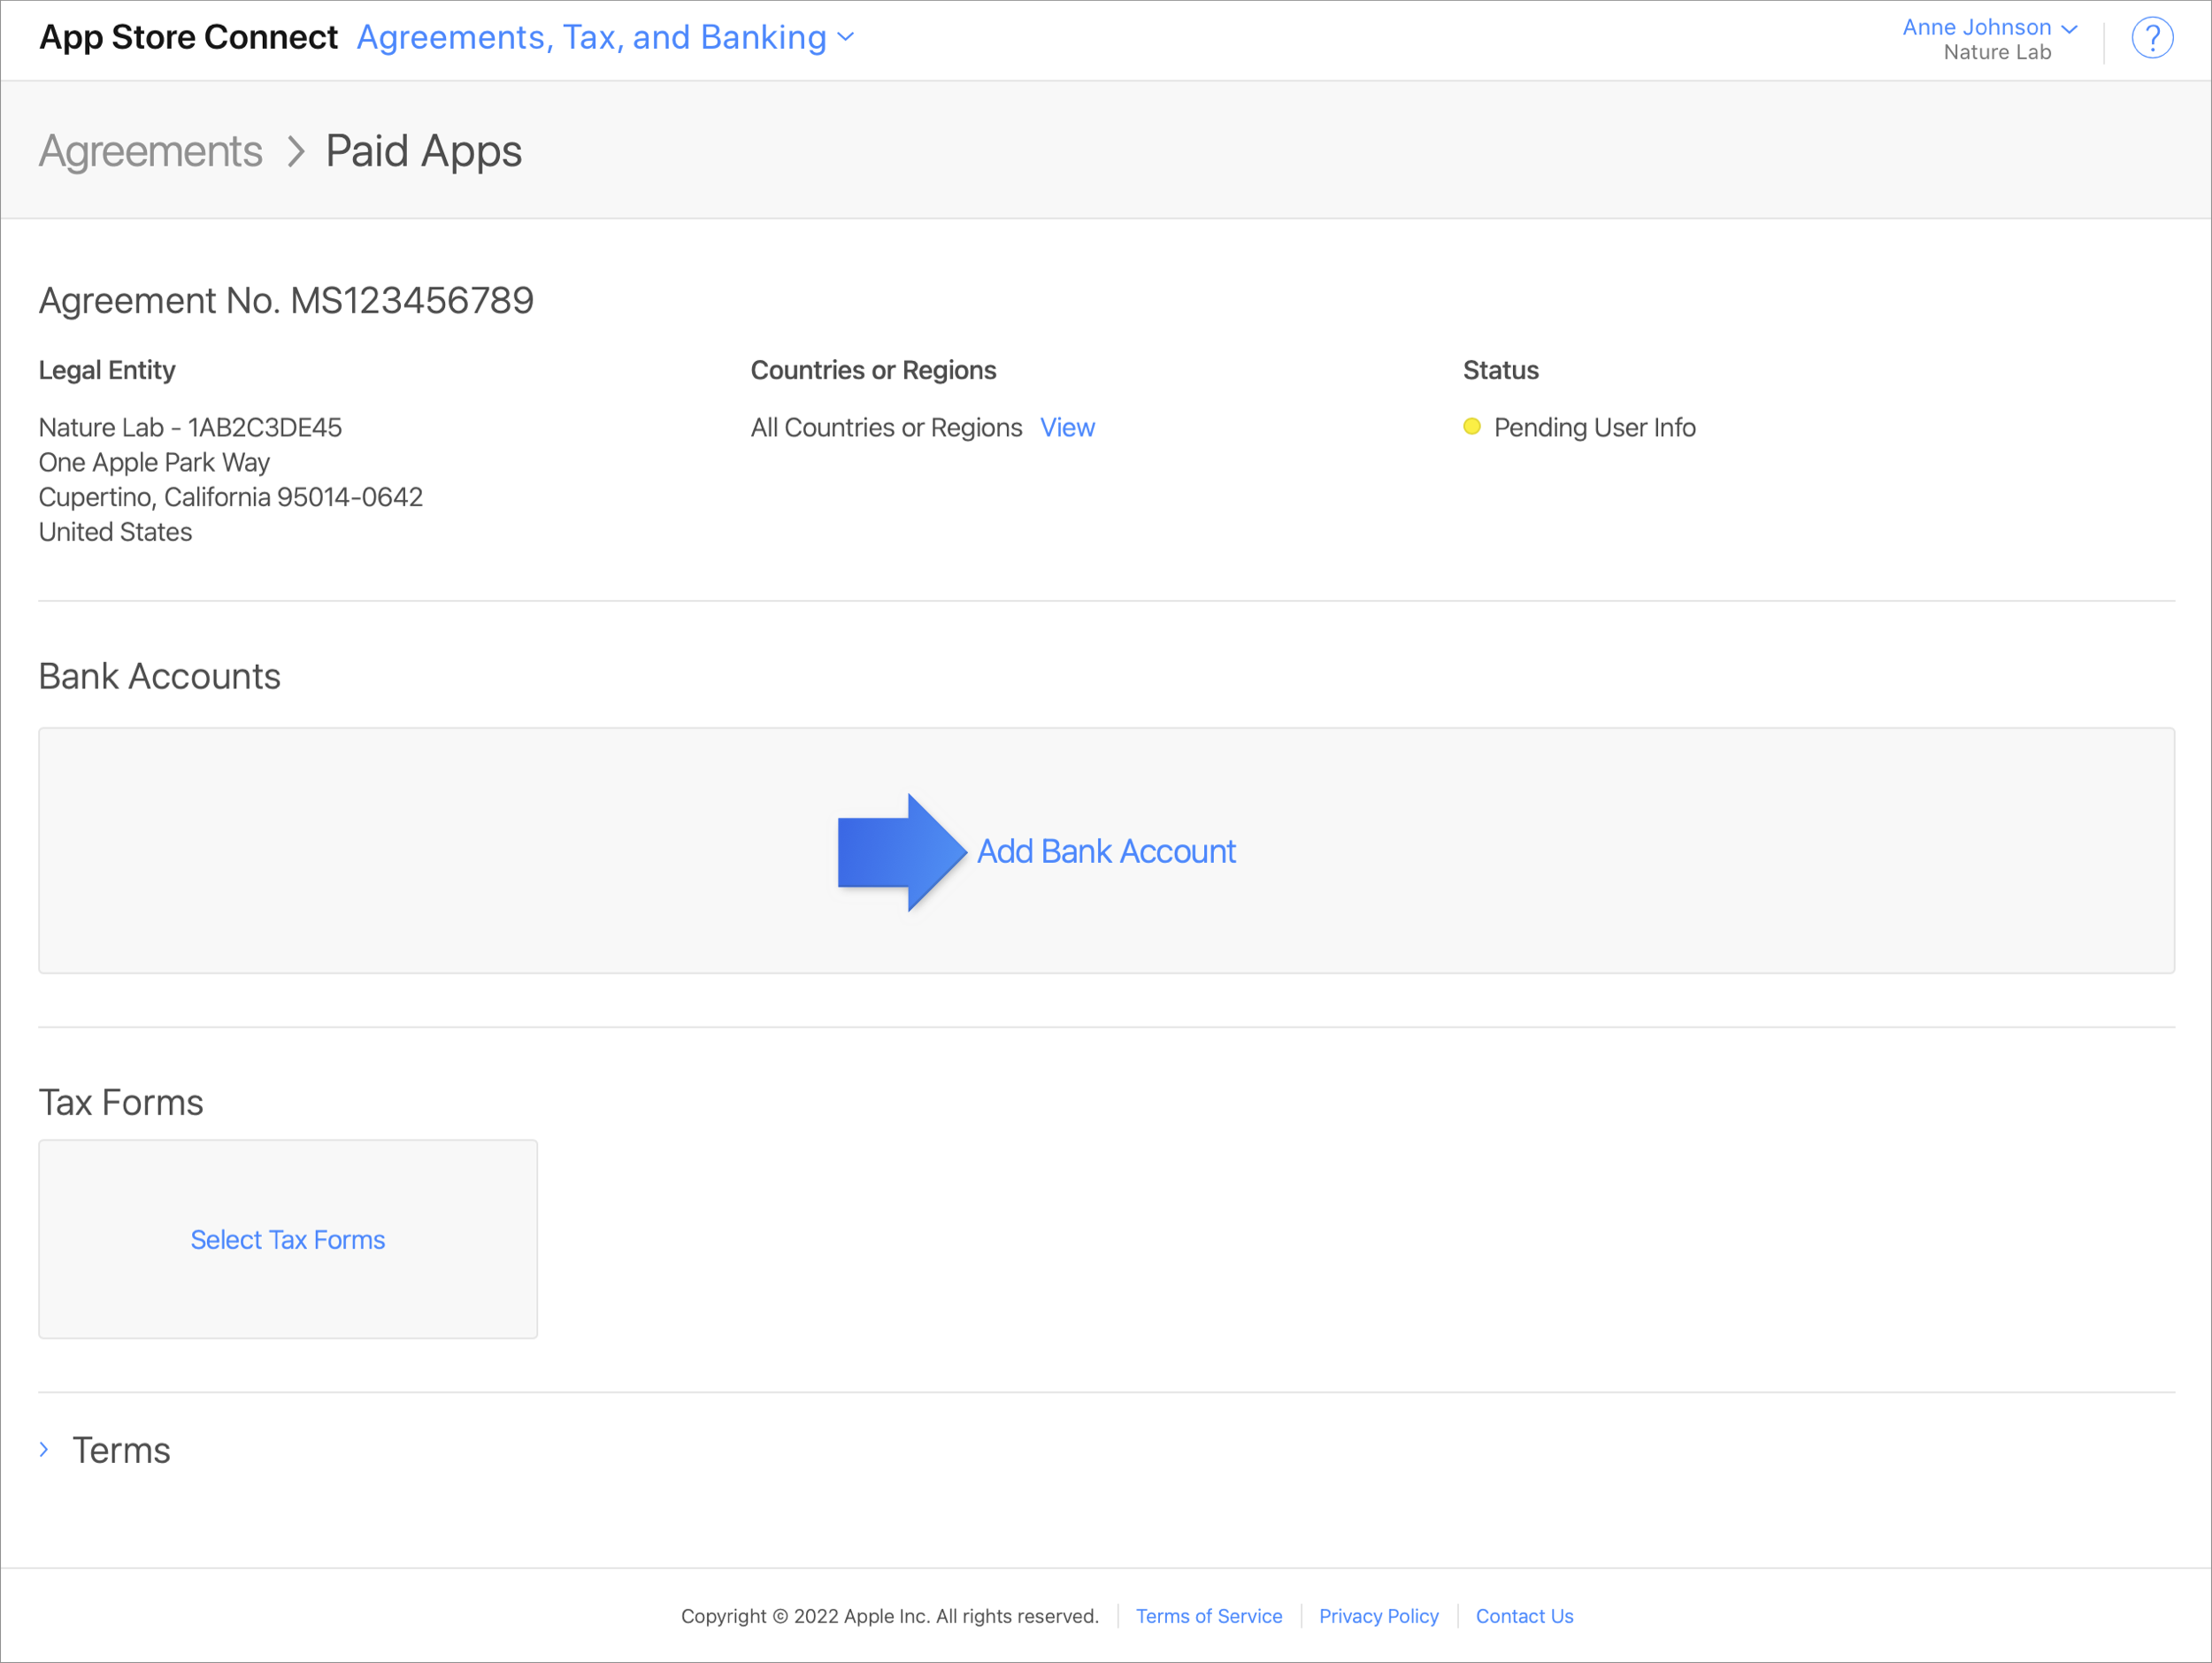
In the "Tax Forms" section, click Select Tax Forms and add the tax forms of applicable countries. Note that a U.S. tax form is mandatory for all developers.
Once you've selected the tax forms applicable to your app, you will be able to complete them from the "Tax Forms" section.
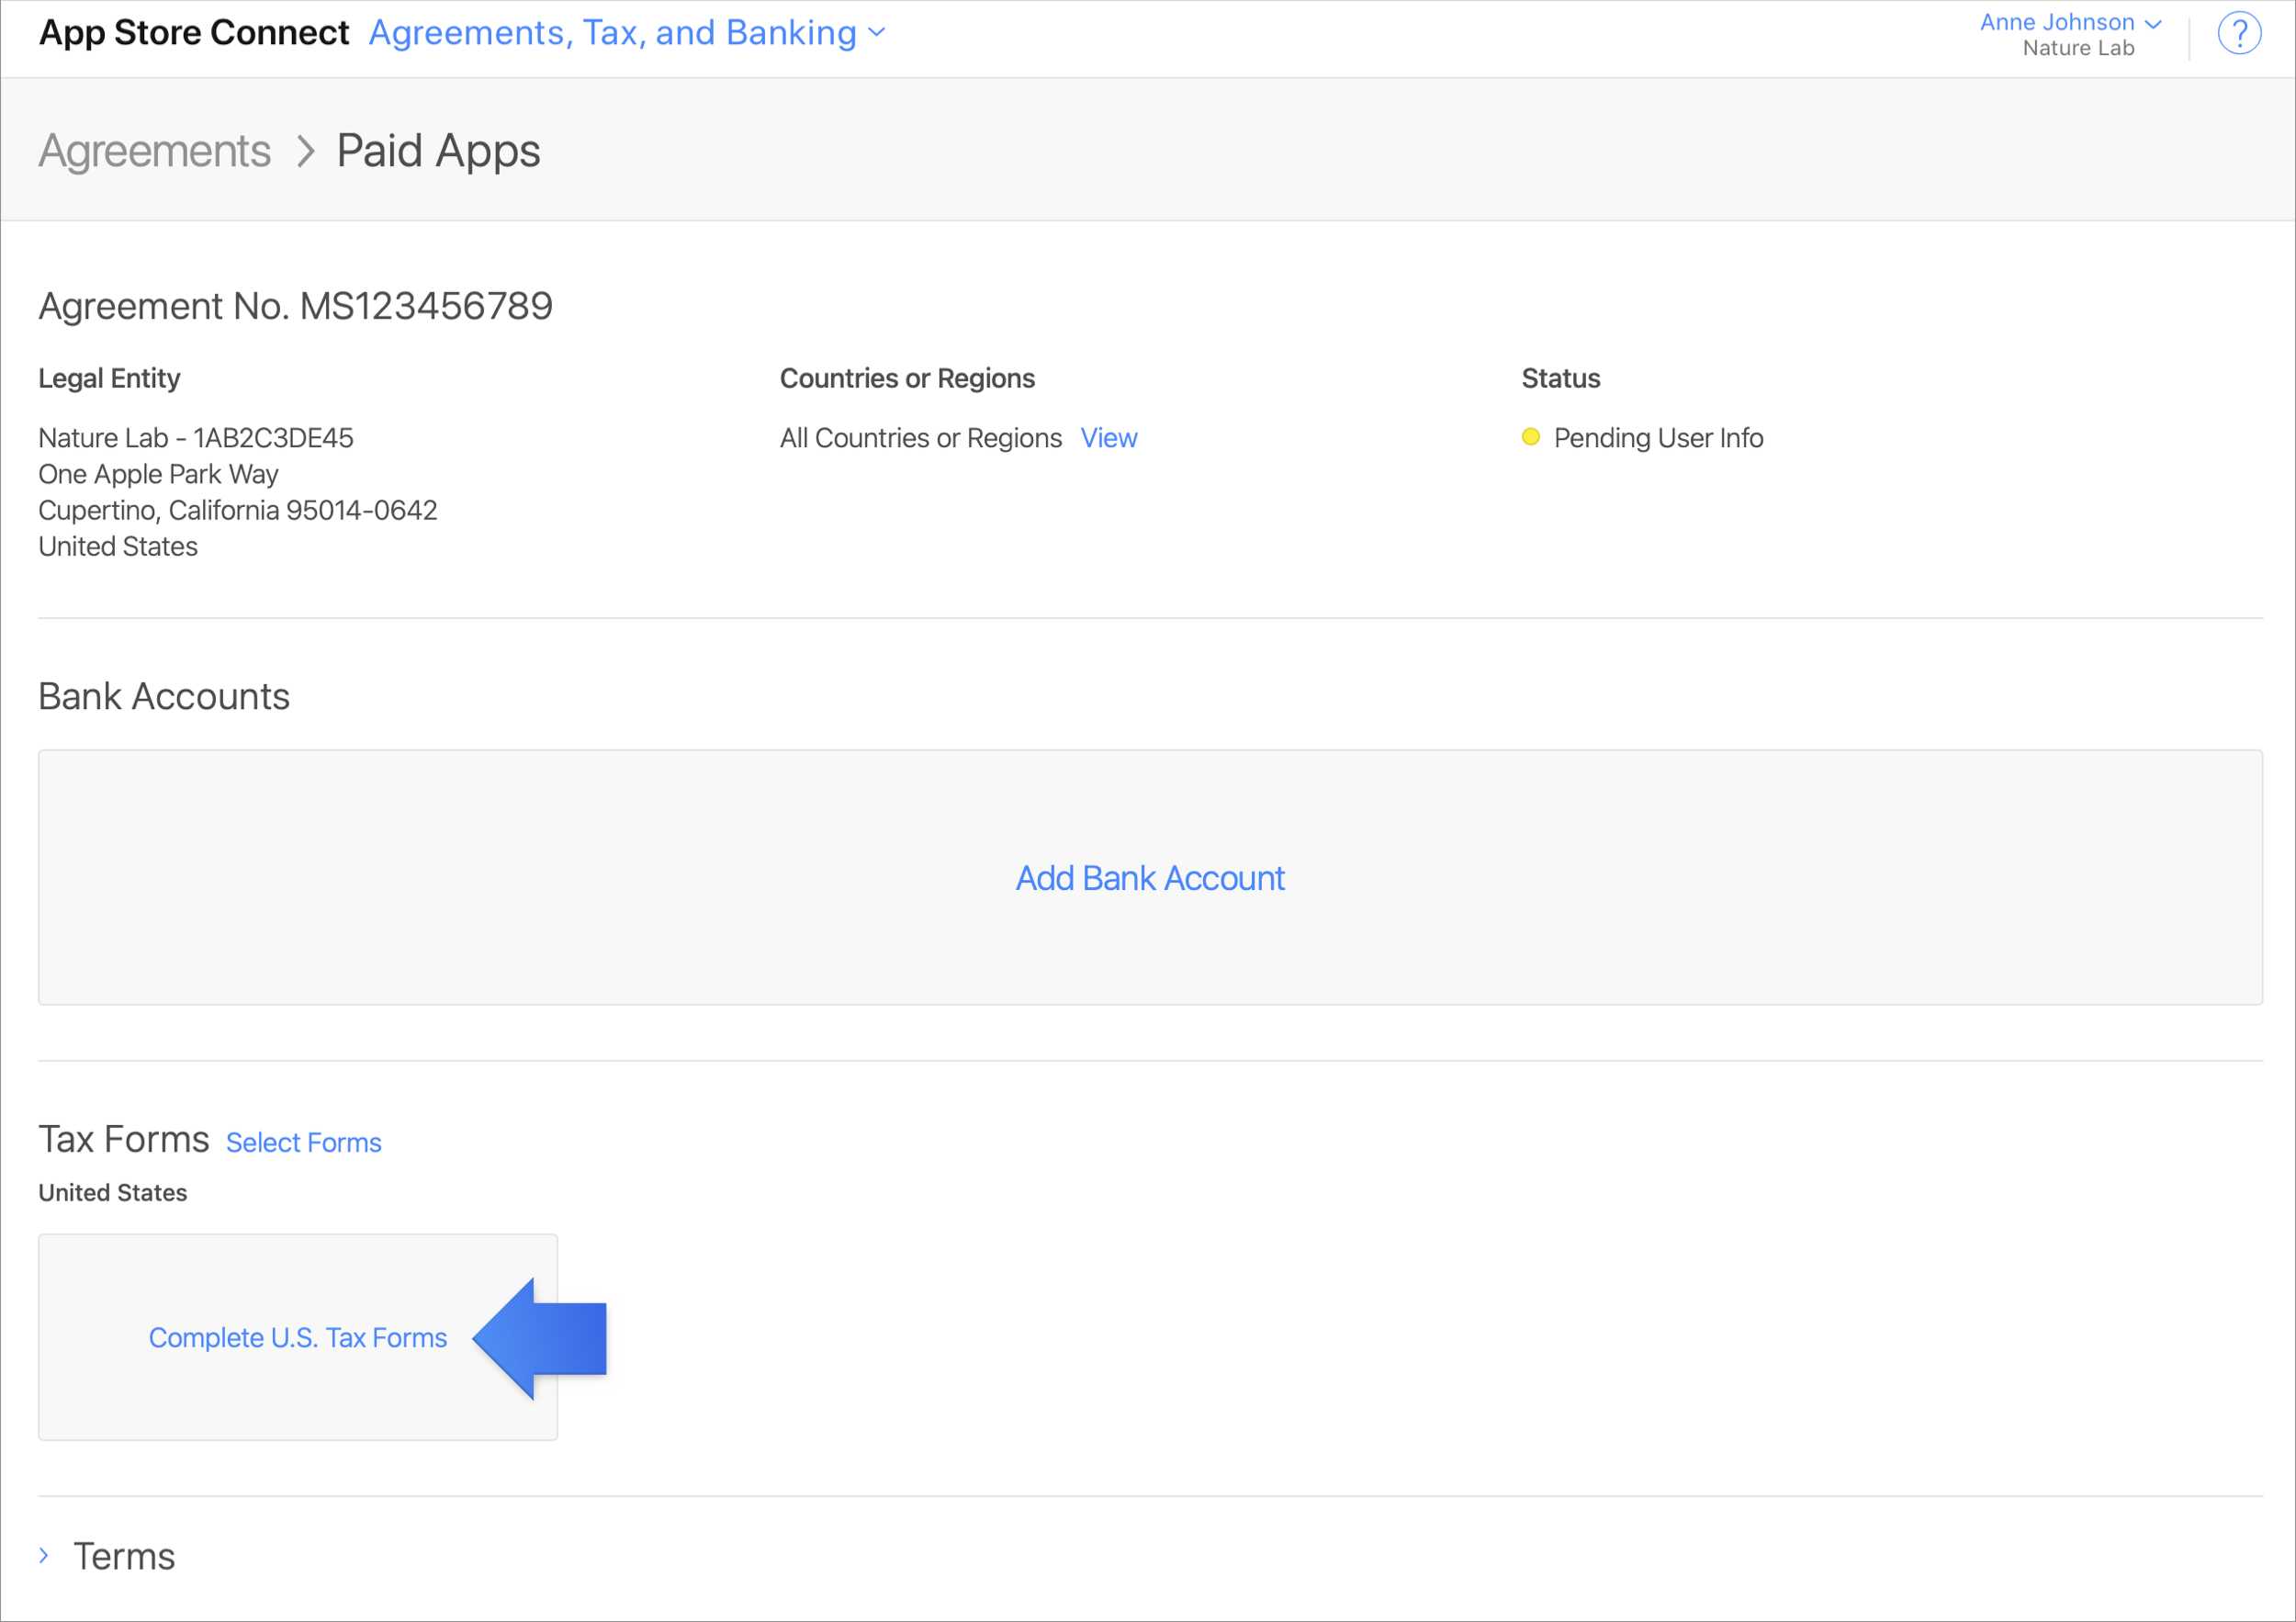
After you've completed the above, the agreement's status will change to "Processing". After Apple has verified the info you provided, which usually takes about an hour, the agreement's status will change to "Active".
Add a new app
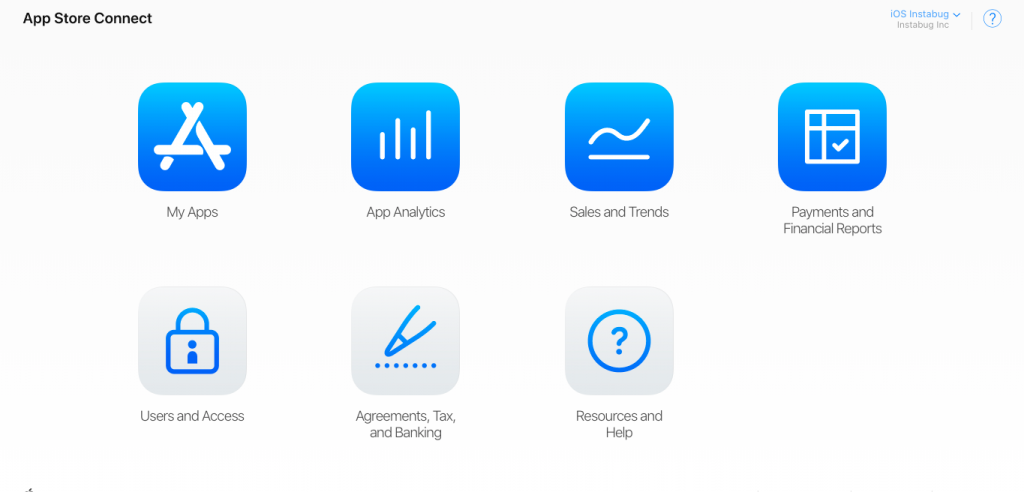
In the App Store Connect dashboard, select My Apps.
Click on the + sign in the upper left-hand corner, then New App.
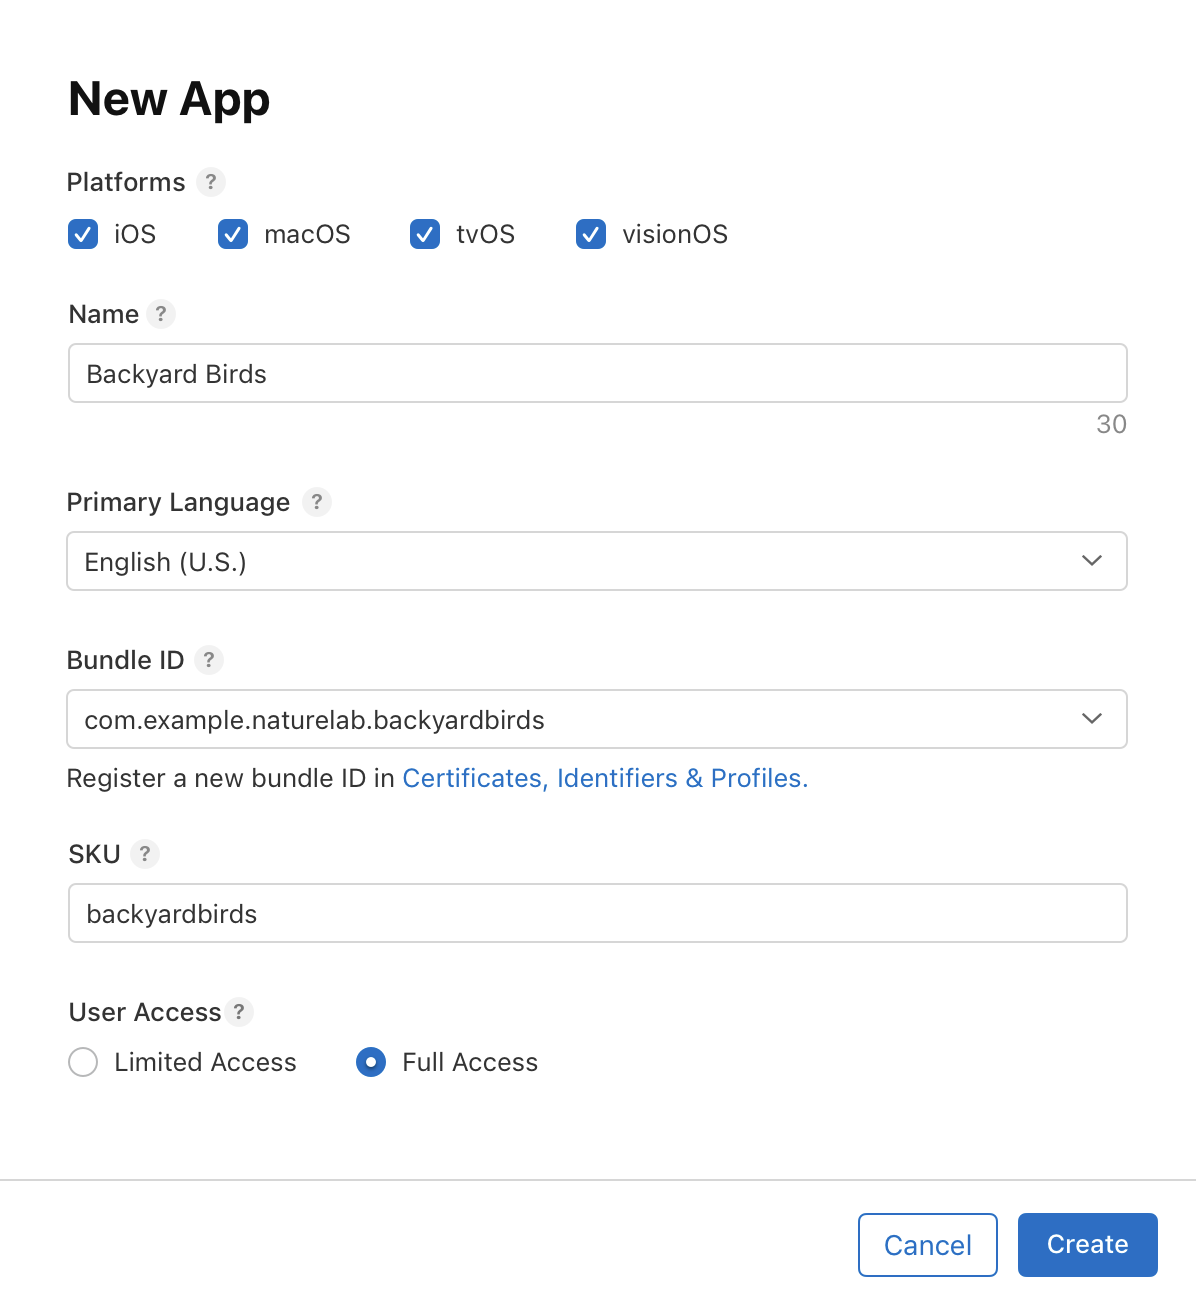
To create a new App Store Connect record, you'll need these details: platform, app name, primary language, bundle ID, and SKU. You can't really change these details later, so be sure of what you enter.
- Use keywords in your app name to optimize for discovery.
- The bundle ID must be an exact match of the bundle identifier in your Xcode project Info.plist file (in the target's General > Identity section).
- The SKU is not visible to users and is up to you to set. It can be an identifier you use in your company or something else that is meaningful for you. Acceptable characters include letters, numbers, hyphens, periods, and underscores, and it must begin with a letter or number.
If applicable, you can also set user access at this step.
While you can upload and app bundle directly to App Store Connect, we'll cover the steps you need to follow to upload the build through Xcode.
- In Xcode, select Generic iOS Device as the deployment target.
- Choose Product from the top menu and click on Archive.
- The Xcode Organizer will launch, displaying any archives you've created in the past.
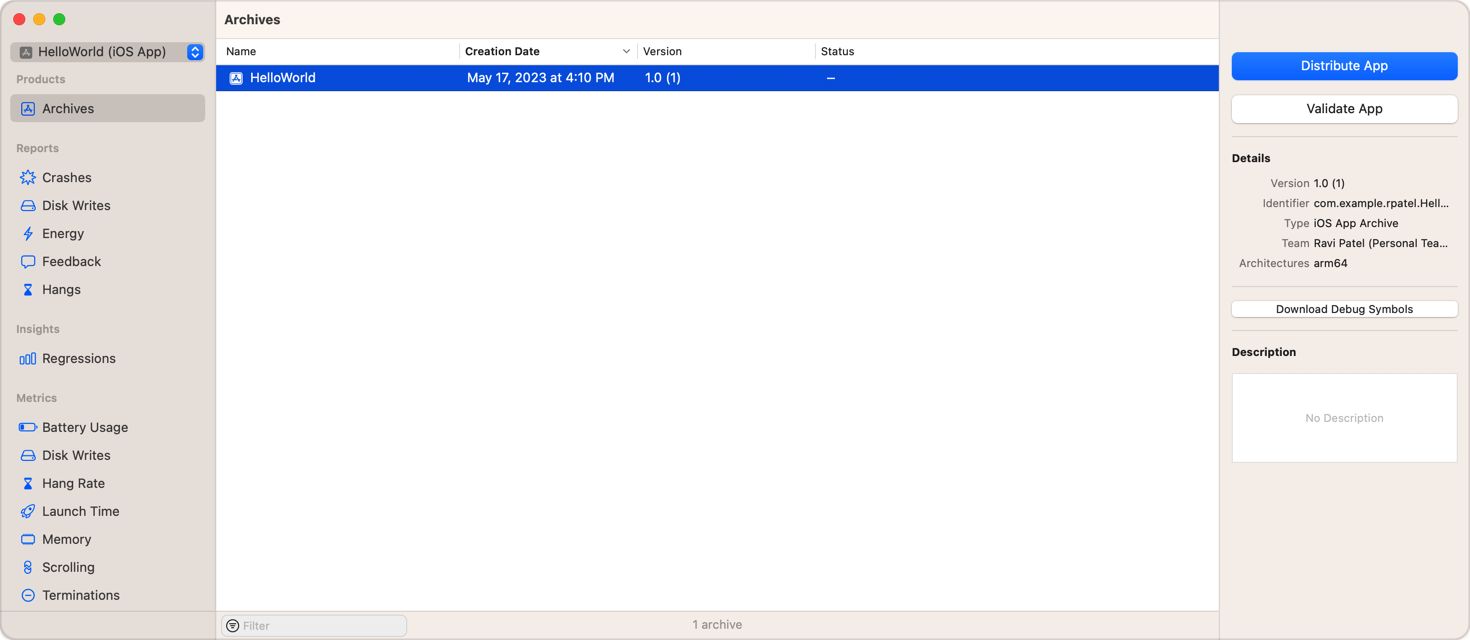
- Select Distribute and you will be prompted to choose a distribution methods.
- Make sure the current build is selected in the sidebar and click on TestFlight & App Store.
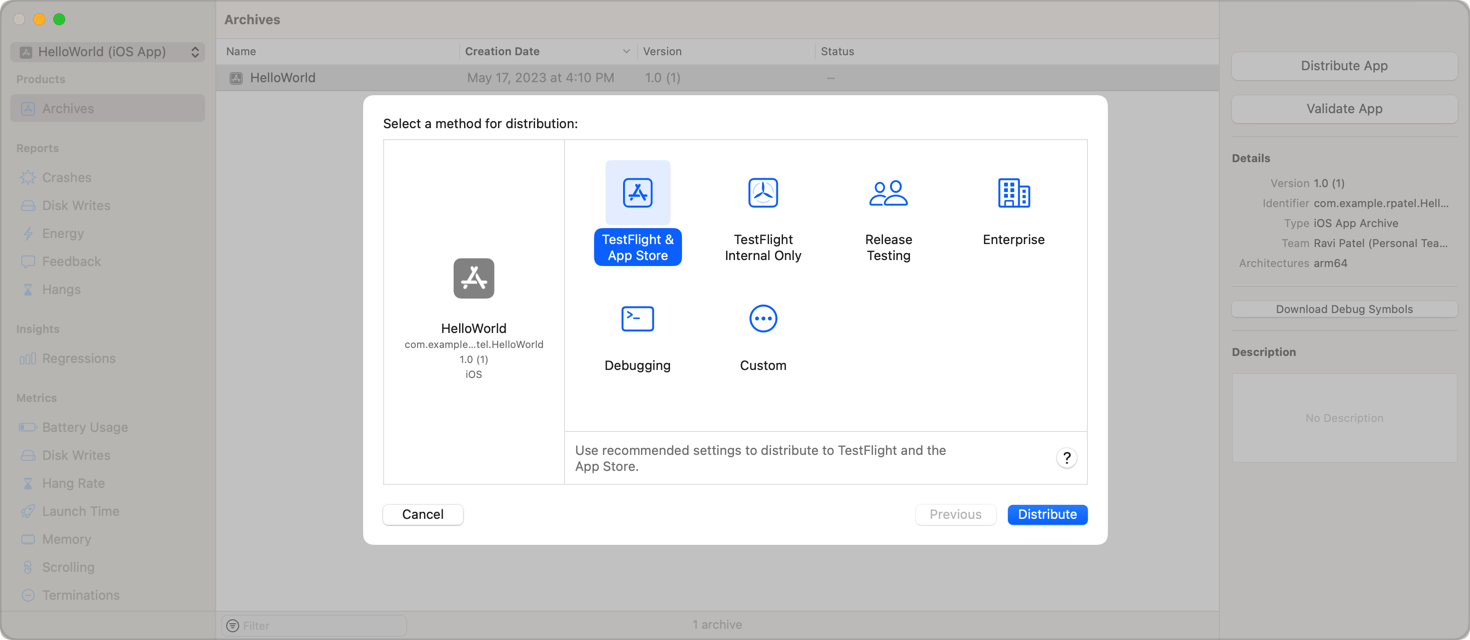
- Select Distribute in the bottom right-hand corner and select Upload in the page that appears.

- In the next page, you can select to upload your app symbols and the build and version management option.
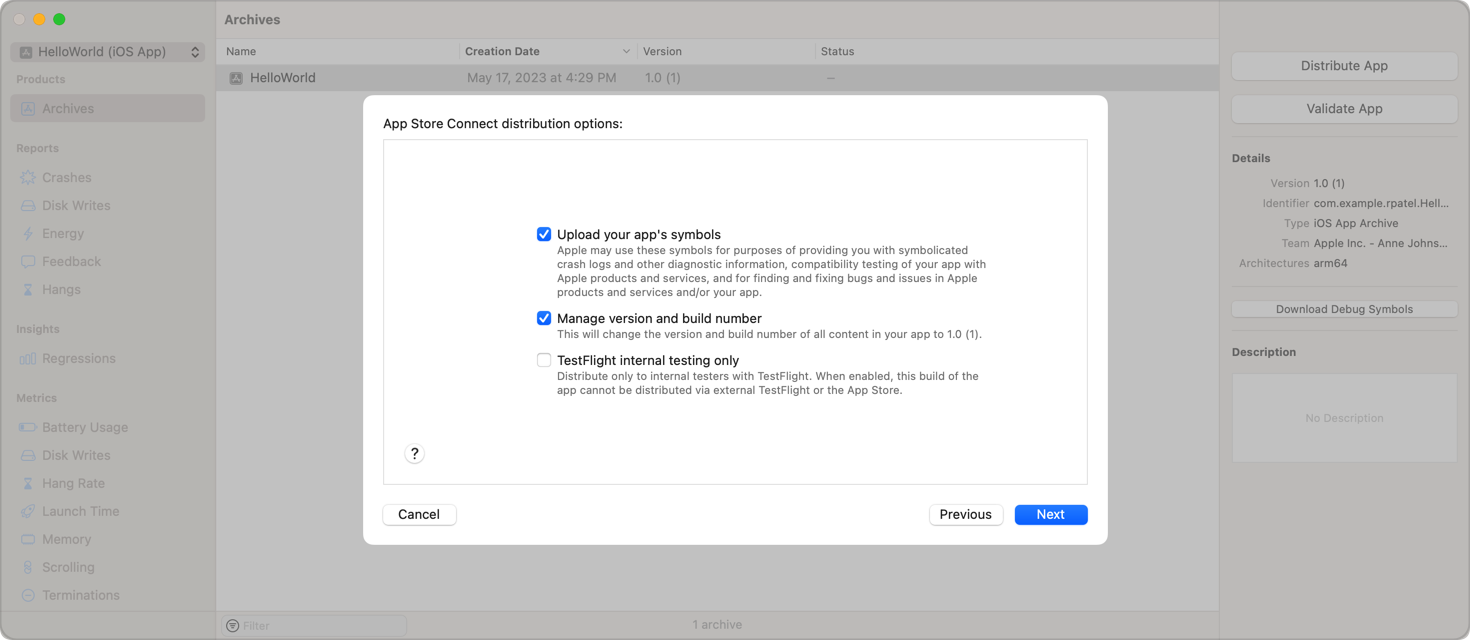
- In the next window that appears, click on Distribute.
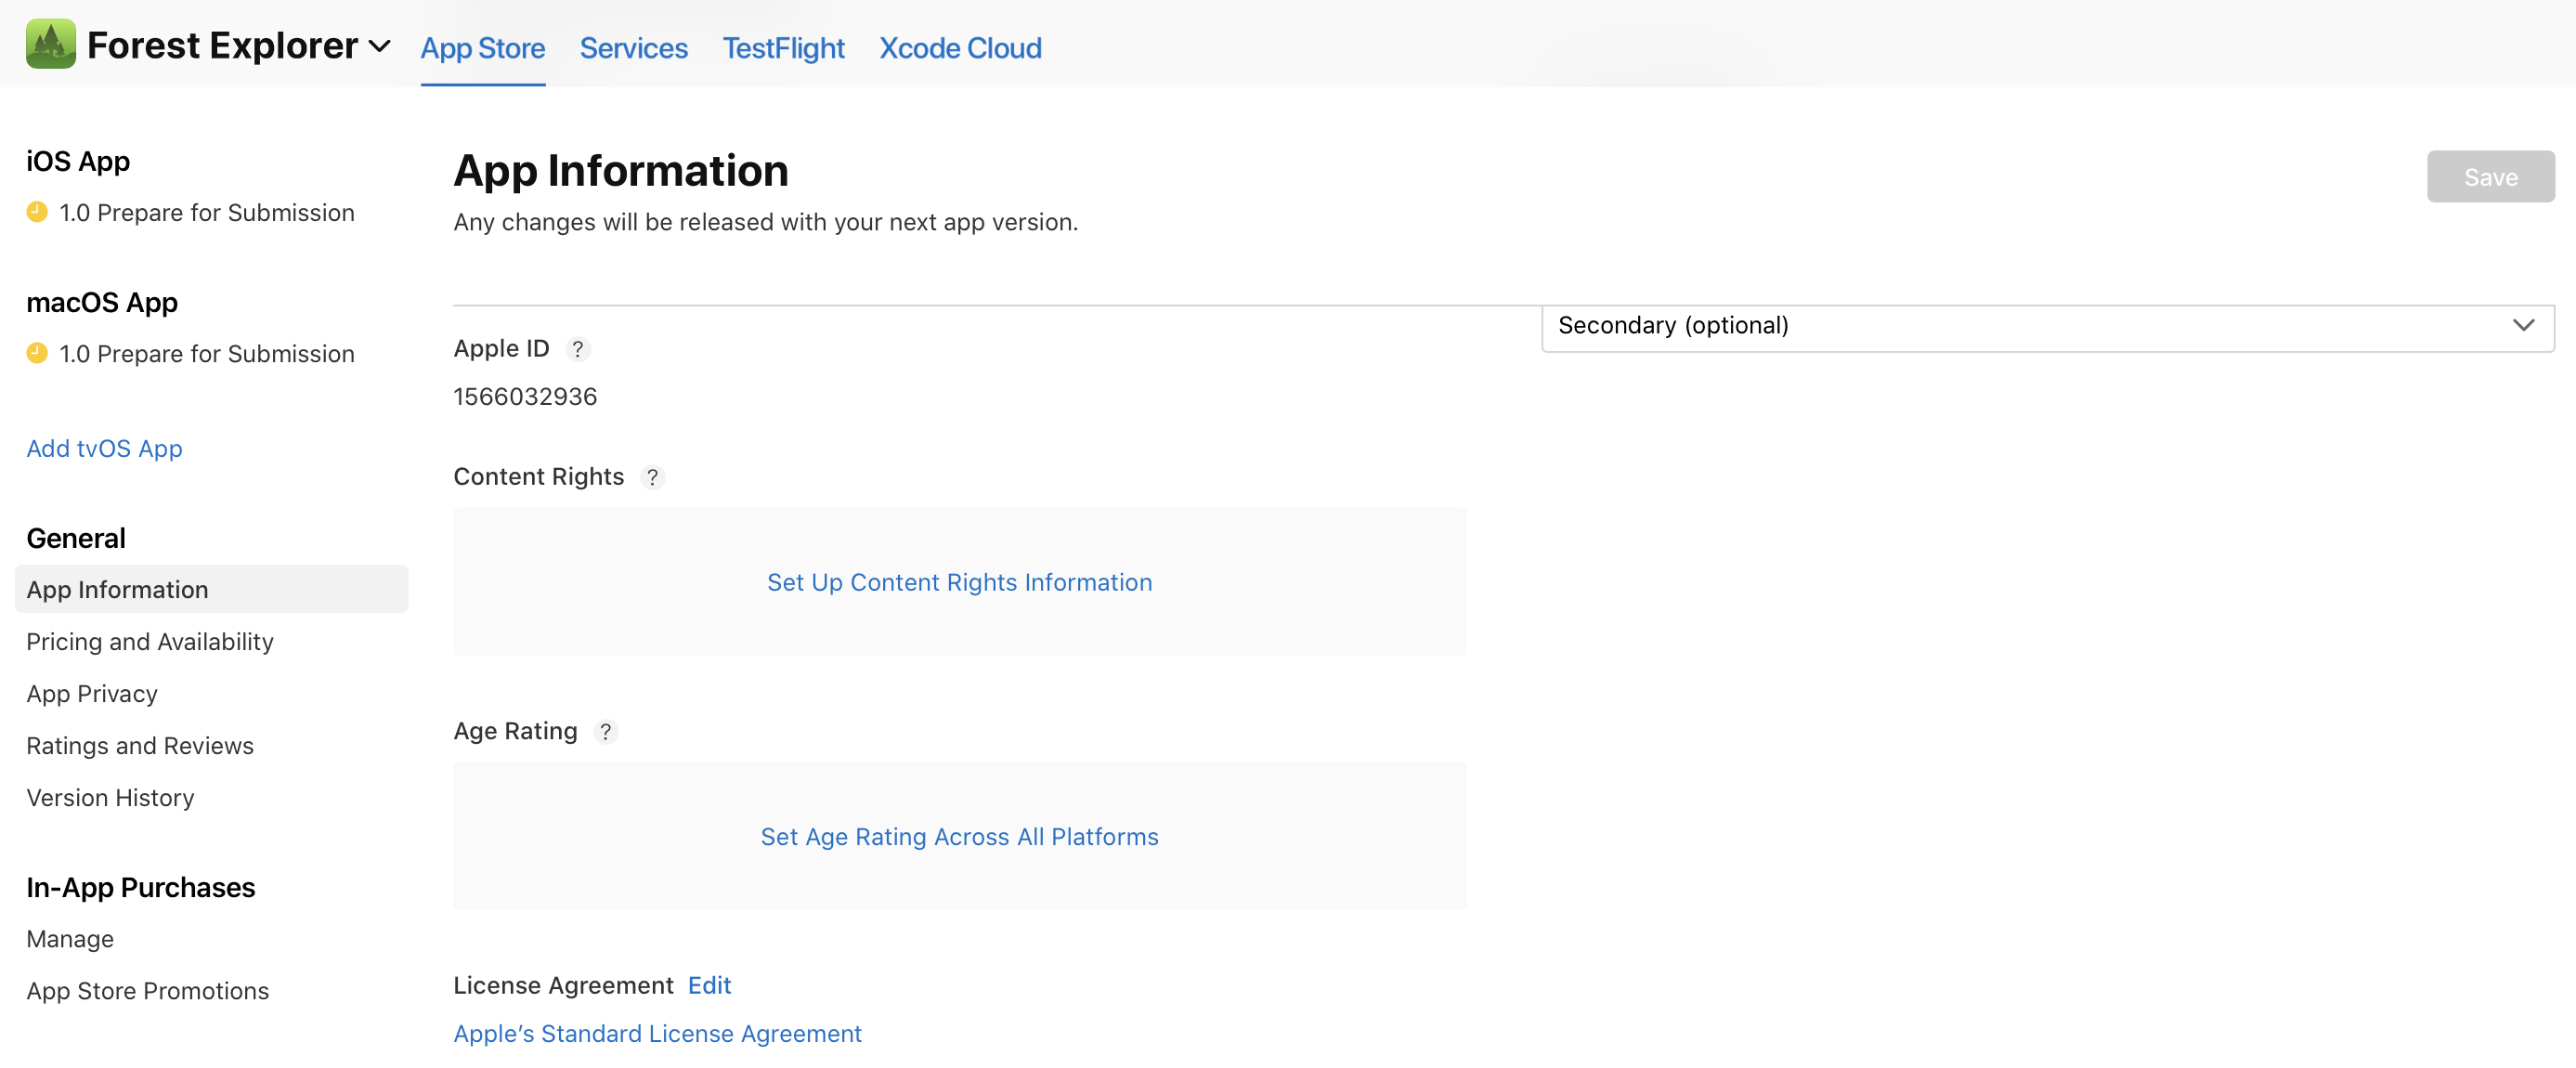
Under the "App Store" tab in App Store Connect, on the "App Information" page you can add additional languages, categories, and your app's Privacy Policy URL.
Set your app as free or select its price tier on the "Pricing and Availability" page.
Under the "Features" tab, you can add configurations to any App Store technologies in your app, like Game Center and in-app purchases.
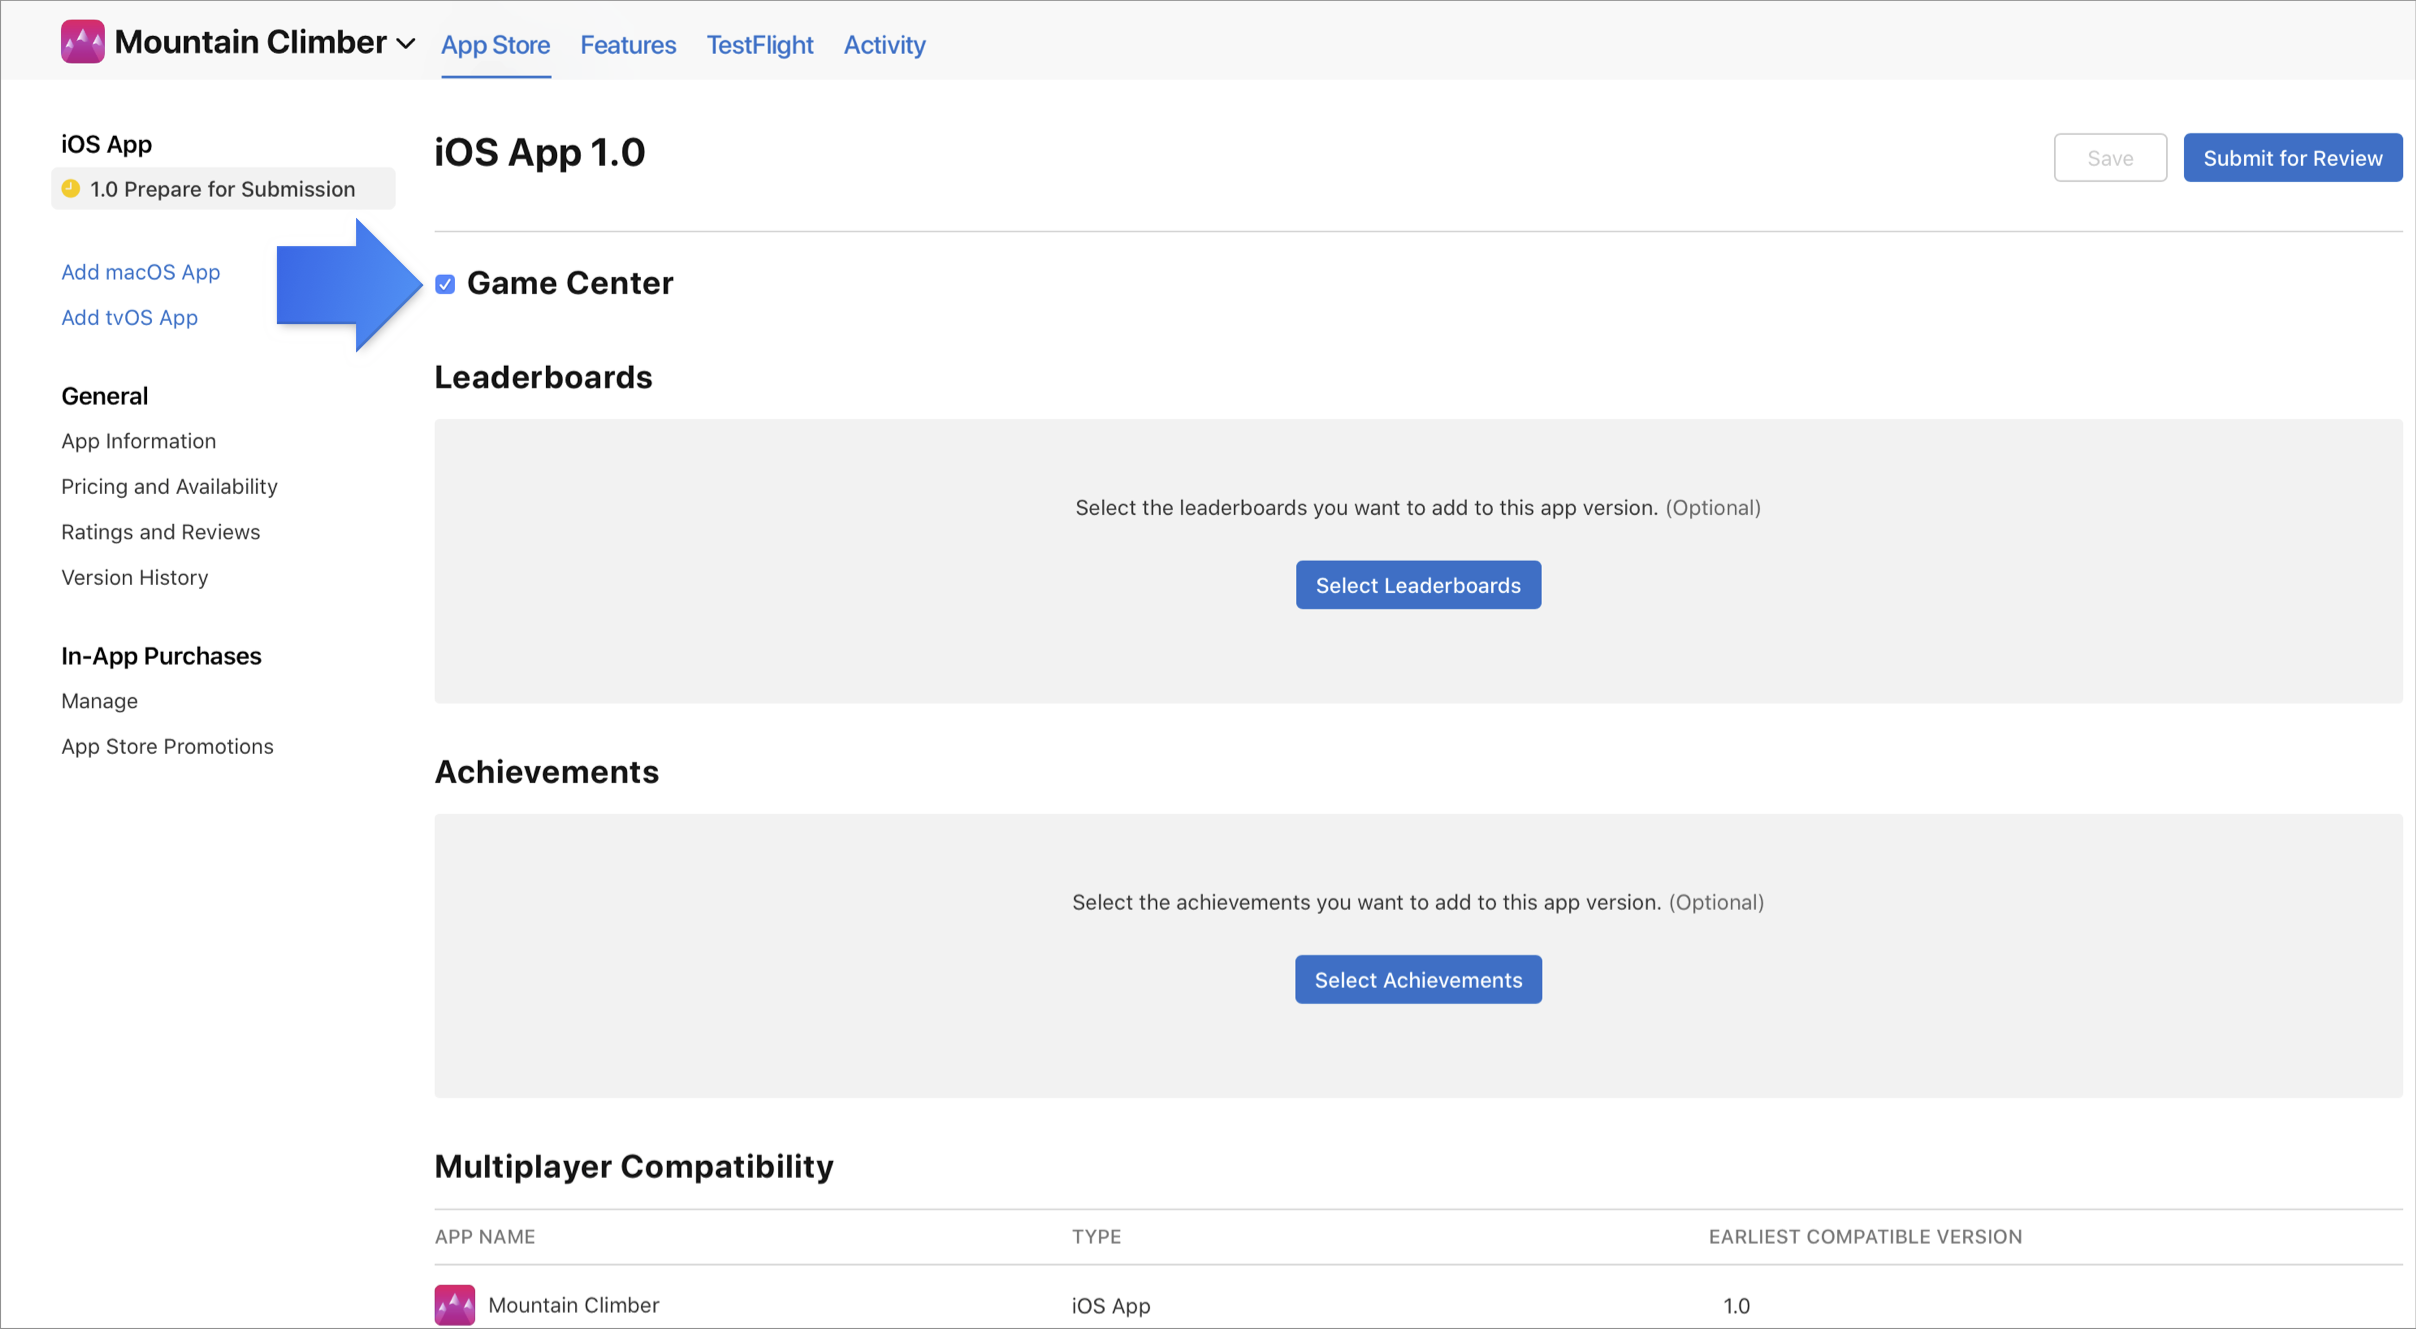
At this stage, your app is marked with a yellow dot and the status "Prepare for Submission" in the left-hand panel under "App Store". Select the build you want to configure. This is where you will add the information for your product page on the App Store.
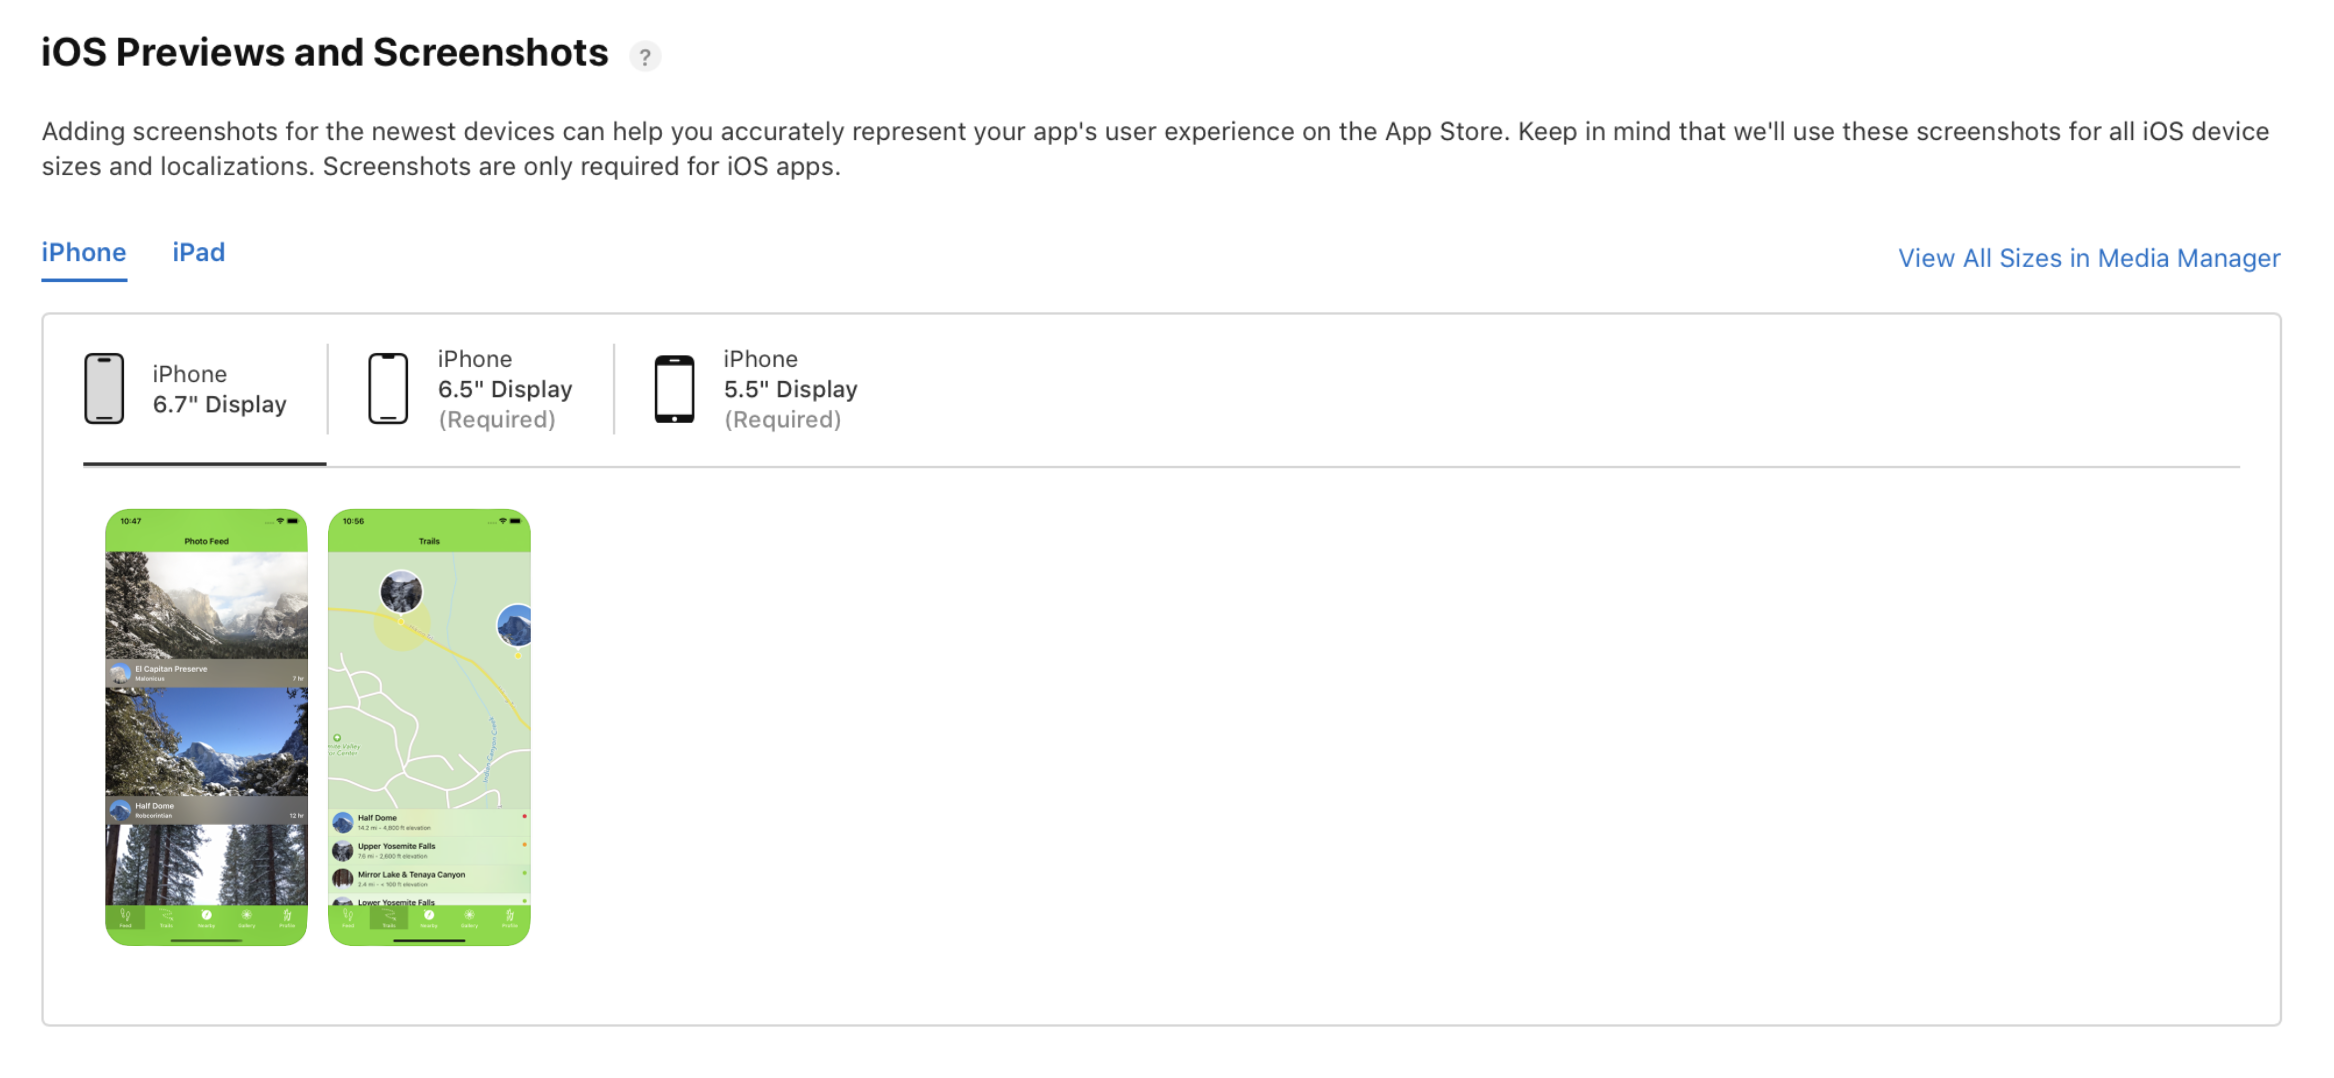
Upload your app's screenshots (in JPEG or PNG format and without status bars). You can upload a set of screenshots for one device and use them for all the other sizes.
Scroll down and enter your app's description, keywords, support URL, and marketing URL.
- Your app's description and keywords are critical. Make sure you optimize them for discovery.
- The support URL can be as simple as a landing page with a contact form.
- The marketing URL can be your app's website and is optional.
In the "General App Information" section below, upload your app's icon, and enter its version number, and copyright and contact information.
- Your app's icon should be 1024px x 1024px.
- The version number should exactly match the one in Xcode.
- The copyright info typically looks like this: "Copyright (c) 2017, Instabug, Inc.".
- The contact info here is what will be displayed to users.
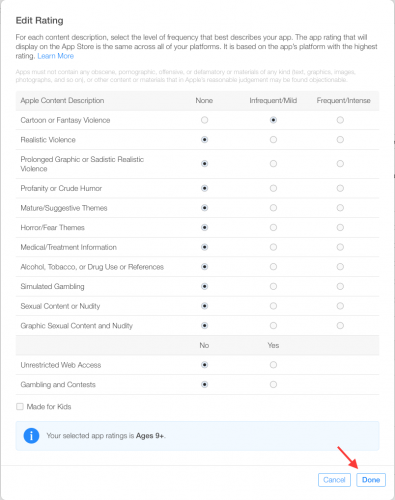
Click on Edit next to "Rating" and select the applicable options for your app. Be honest -- your app can be rejected during the review if it doesn't match its rating.
Under the "App Review Information" section, enter your contact info, any notes you have for the reviewer, and set the version release date.
- The contact information here is for the reviewer in case they need to reach you directly.
- Notes for the reviewer can include information about specific hardware they might need to use or user account information they might need for access.
- For first releases, you should typically leave the version release date as automatic.
In the top right-hand corner, click Save. Now you're almost ready to "Submit for Review".
Scroll to the "Build" section in your app's App Store Connect record.

Click on "Select a build before you submit your app."
Choose the build that you uploaded through Xcode. Click Done in the bottom right-hand corner, then Save in the top-right hand corner, then Submit for Review.

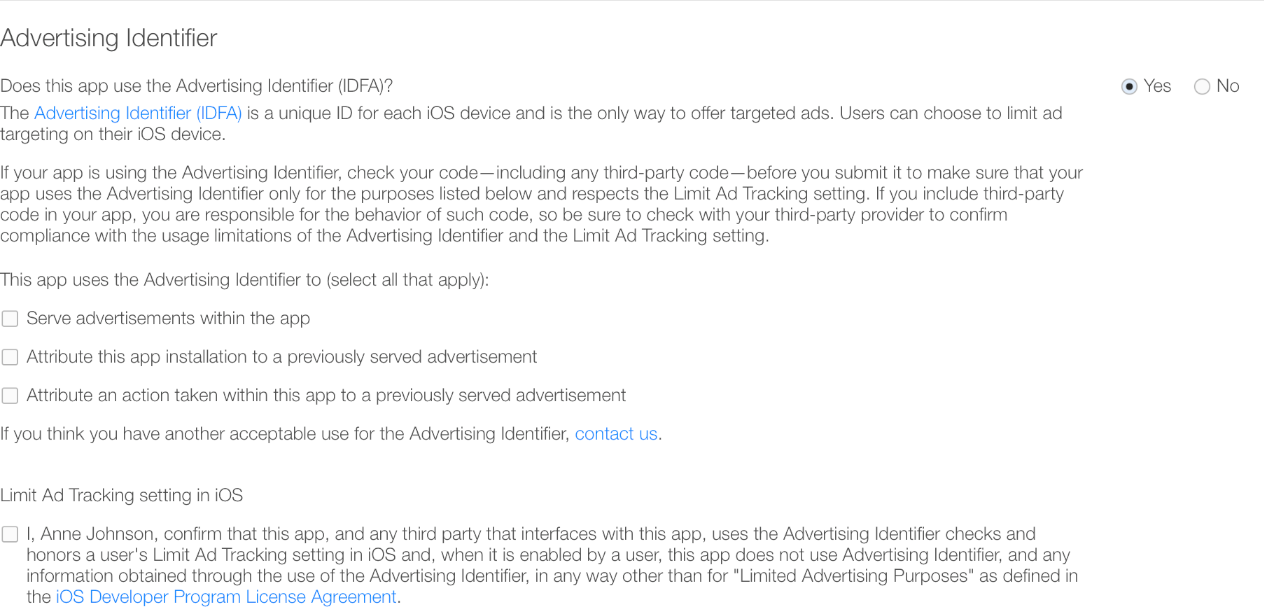
Finally, answer the Export Compliance, Content Rights, and Advertising Identifier questions and click Submit.
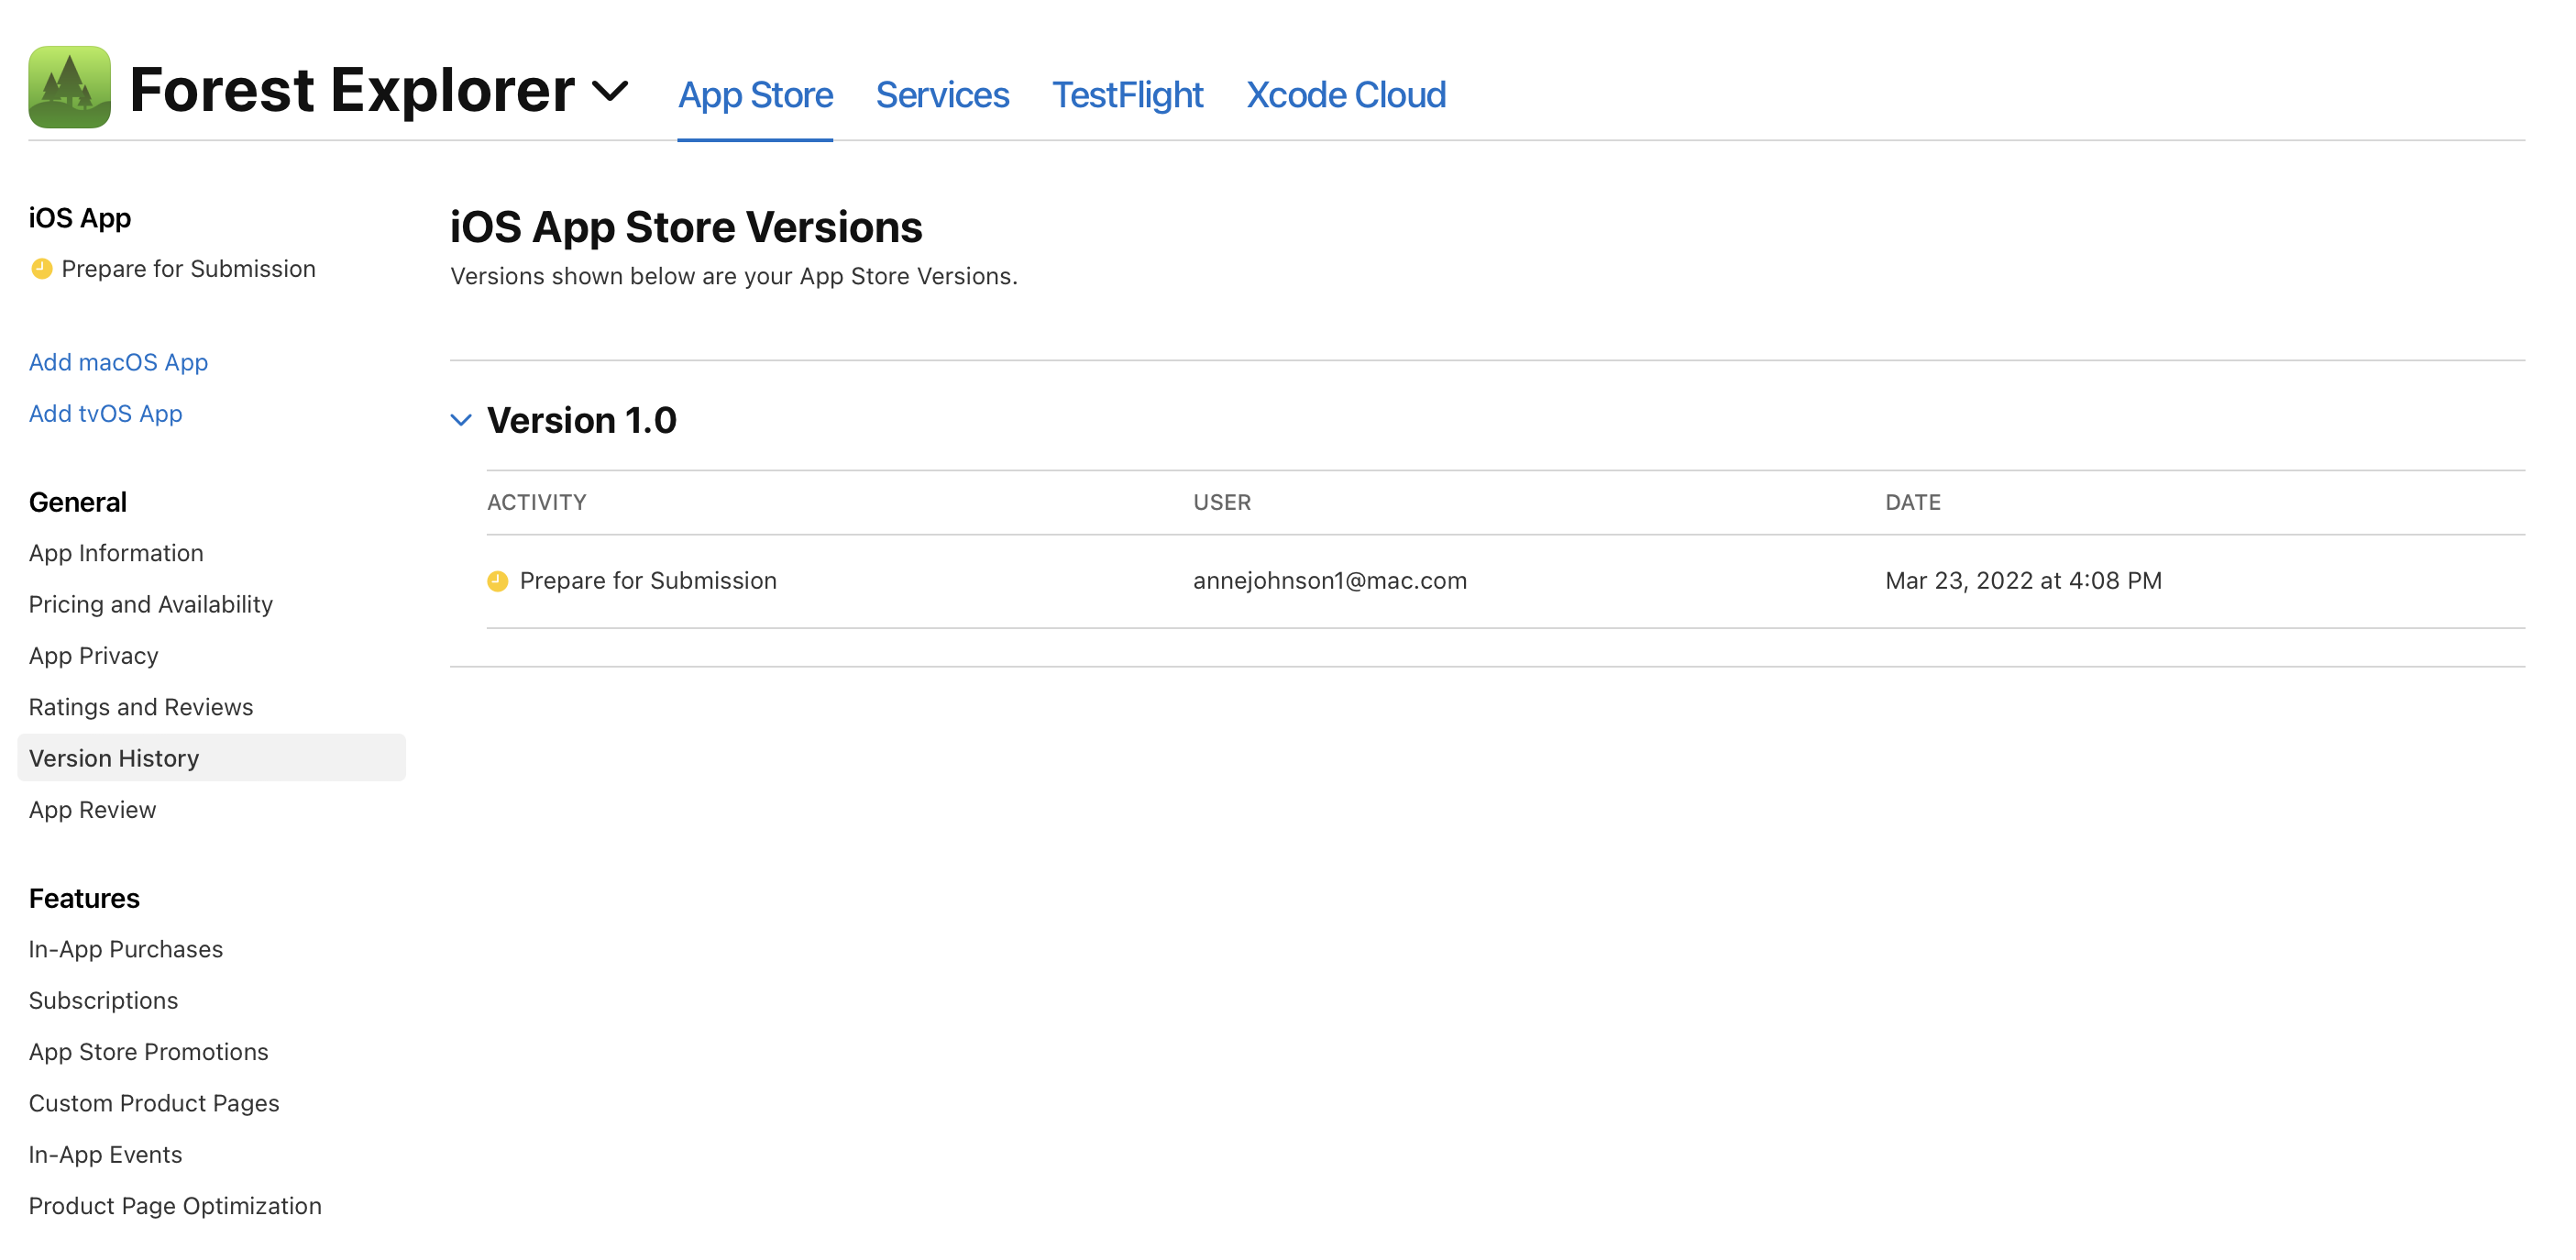
Your app's status is now "Waiting For Review".
In App Store Connect, select Activity in the top horizontal menu, then Version History in the sidebar.
How long does it take to get App Store approval?
In most cases, it takes about one to three days to receive approval, and it can take up to 24 hours for your app to appear in the App Store after approval. Check current average app store review times here.
You'll receive e-mail notifications at each stage. Read more about each status here.
If you're on a tight timeline and need to align your release with a specific event or if you need to release a new version with an urgent bug fix, you can request an expedited review.
If your app is rejected
You'll have to make the necessary fixes before you can submit your app again for review. Use the Resolution Center in App Store Connect to communicate with Apple about any questions you may have. You can also escalate the issue and submit an appeal if you believe your app was wrongly rejected.
One of the most common reasons for rejections from the Apple App Store is performance. Make sure that your app is complete and that you've tested it thoroughly and fixed all bugs. Using a bug reporting tool while beta testing will help reduce your app's chances of being rejected due to performance issues.
If your app is approved
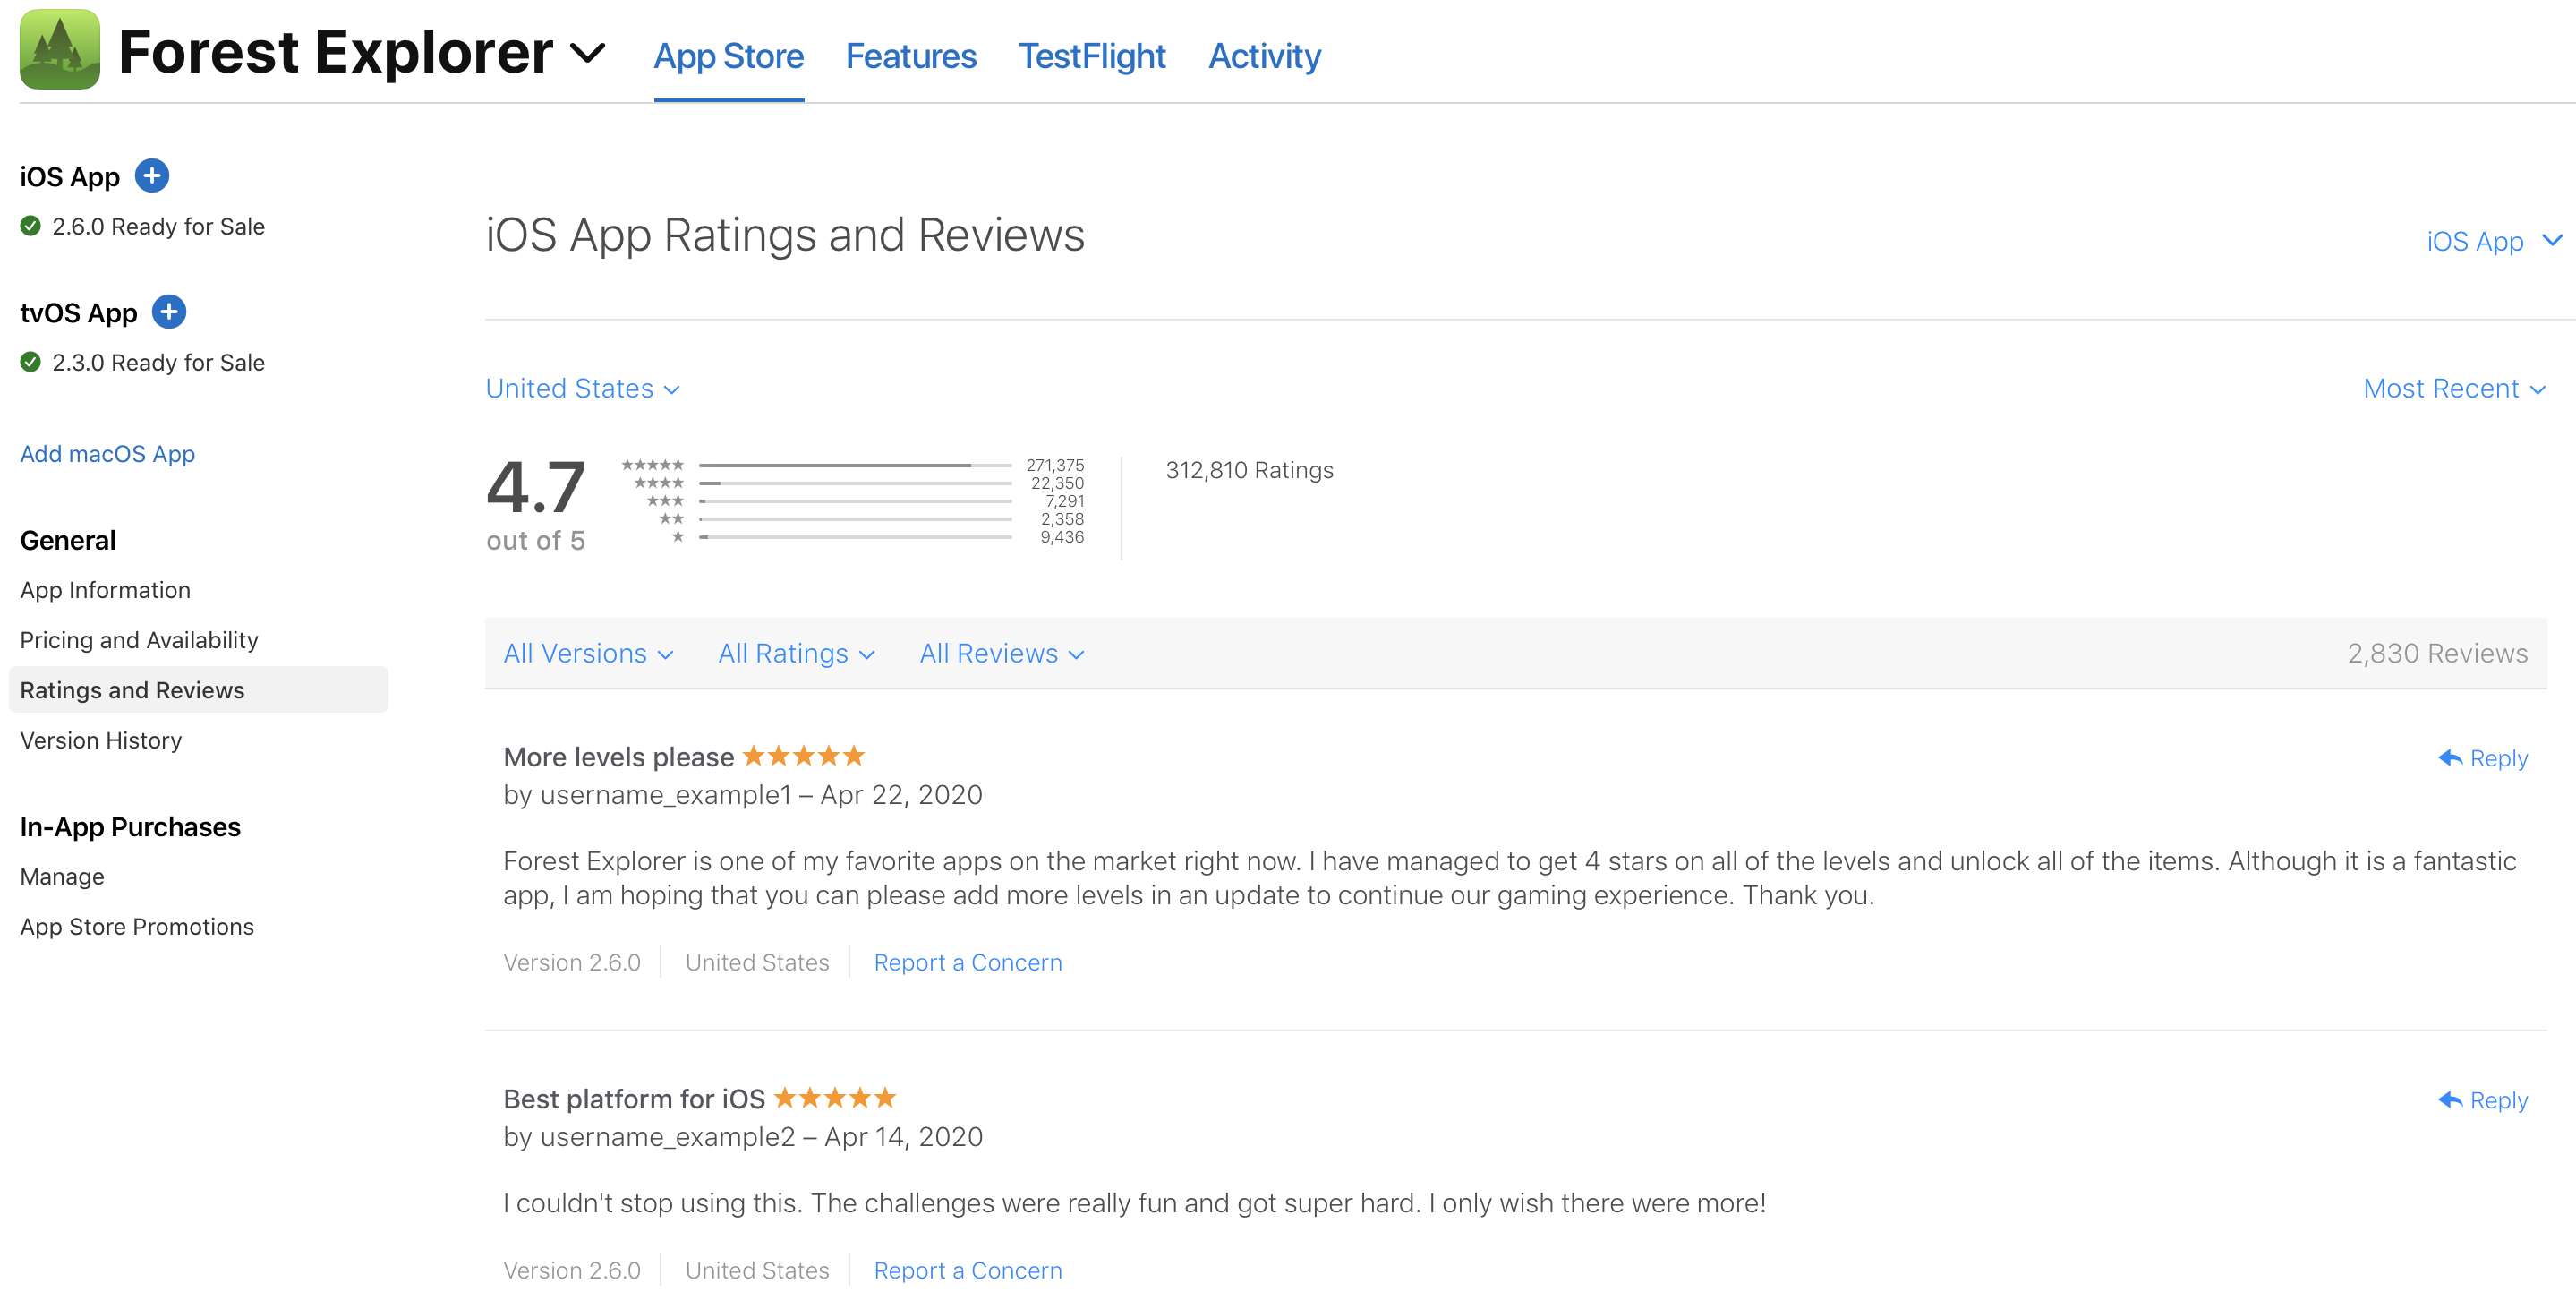
Congratulations! You're now on the App Store. You can view downloads, sales, ratings, and reviews directly in App Store Connect.
Here's how to submit your app to the Apple App Store:
- Create an iOS distribution provisioning profile and distribution certificate
- Create an App Store Connect record for your app
- Archive and upload your app using Xcode
- Configure your app's metadata and further details in its App Store Connect record
- Submit your app for review
- Check on the status of your app
Want to try our latest AI features?
Sign up to the closed beta now
Oops! Something went wrong while submitting the form.
Learn more:
- Analyze Your App's Store Reviews With Our Free, A.I.-Powered Sentiment Analysis Tool
- iOS Crash Reporting Best Practices
- How Much Your Mobile App Performance Costs Your Business
- Performance Monitoring and User Experience for Mobile App Growth
Instabug empowers mobile teams to maintain industry-leading apps with mobile-focused, user-centric stability and performance monitoring.
Book a demo to see how Instabug can help your app


