

Contents
In-app surveys are super easy to write, send, and analyze with Instabug. You can ship straightforward surveys without making any code changes, and you also have the option to get more granular with when, where, and to whom you show your surveys. Engaging and understanding your app users is now easier than ever.
Let’s walk you through creating your first survey.
Step 1: basic details
First, open up your Instabug dashboard and head over to the Surveys & Announcements tab. You’ll see brief descriptions and previews of each survey type. Select one to create your first survey.
If you need help at any time, click on the floating blue button on the bottom right-hand side of your screen. We’re happy to jump in and assist you on the spot.
- Custom surveys: Ask your users one or many questions. Specify the answer type for each question: text field, multiple choice, or star rating.
- NPS surveys: Determine user loyalty towards your app with Net Promoter Scores and take action by asking Passives and Detractors (1-8) how you can improve so you can catch negative comments early, and asking Promoters (9-10) to rate you in the app stores.
- App rating surveys: Identify happy users and ask them to rate your app in the app store. Privately ask unhappy users how you can do better.
%20-%20Current%20customers%20(2).png)
For our first survey, let’s go with the classic NPS. Don’t forget to add your title before hitting Next. This title won't be visible to your users.
Step 2: content builder
Here’s where a lot of the important stuff goes. We’ll be writing your questions, choosing follow-up actions and thank you messages, and adding localization in this step.
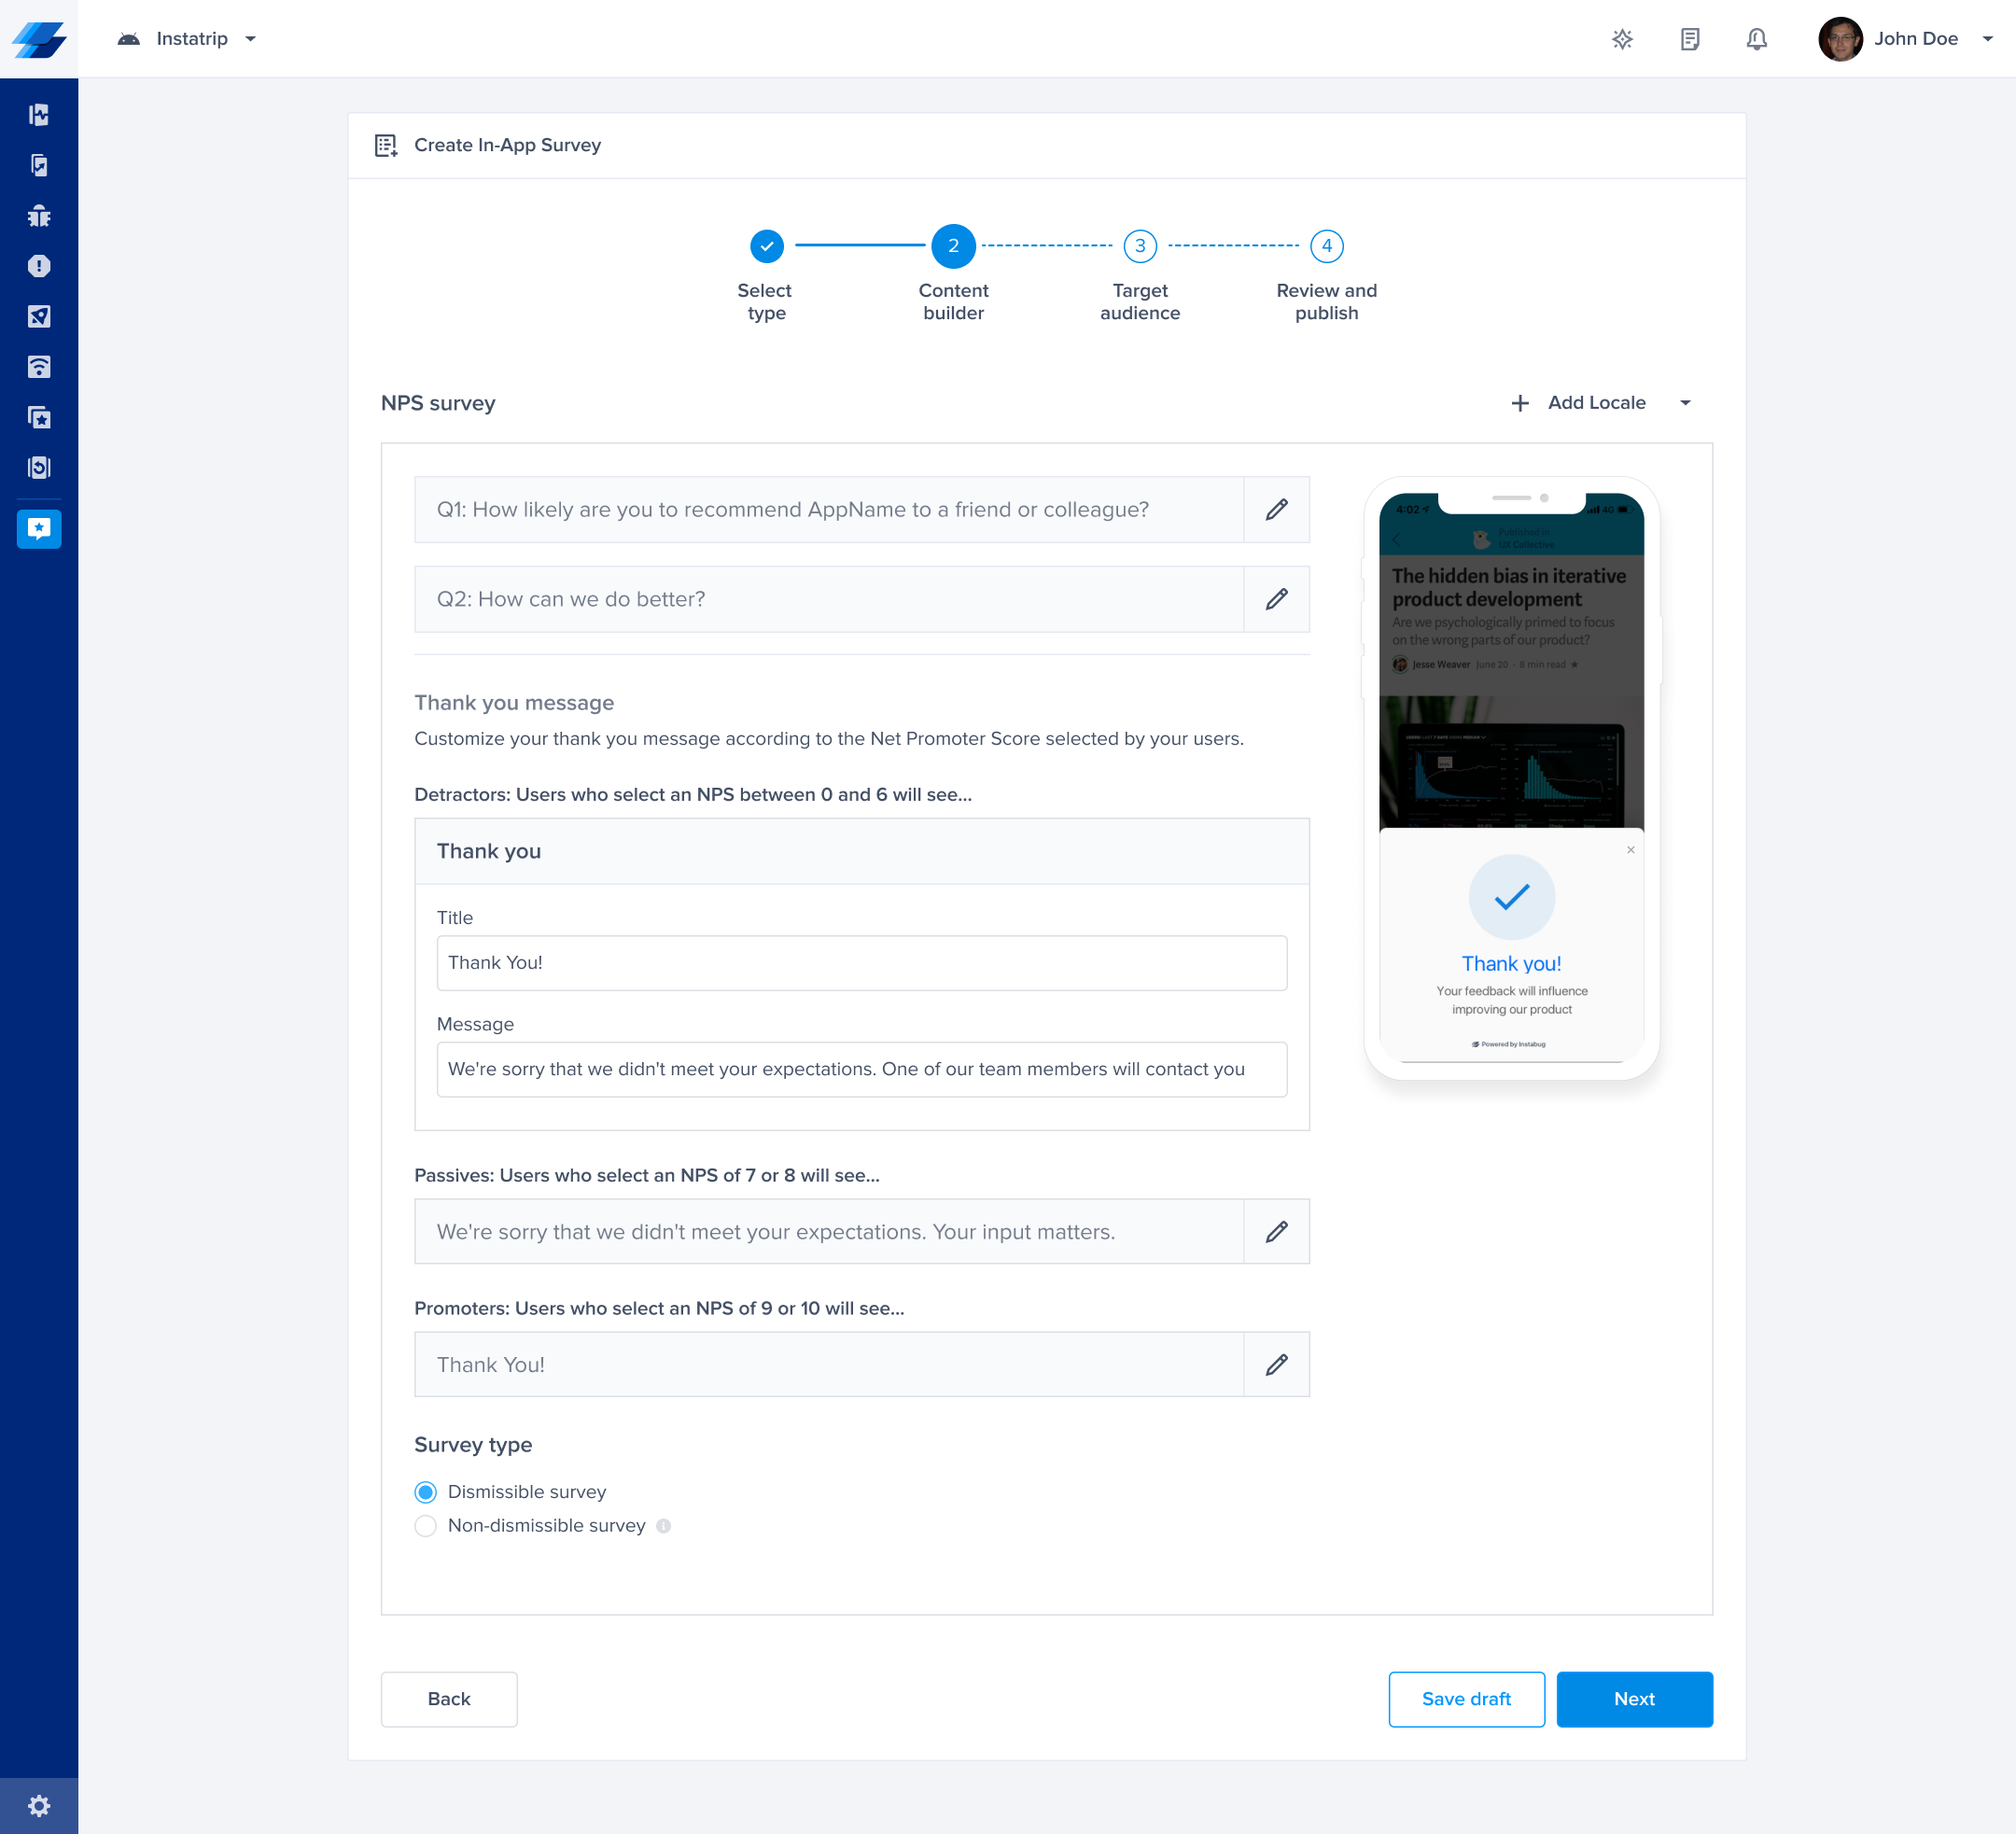
Question 1
Here’s the classic NPS question. Feel free to tweak it as you see fit.
Question 2
This is arguably the most important component of the NPS survey—qualitative feedback. Hit the pencil icon on the right to edit the text as desired.
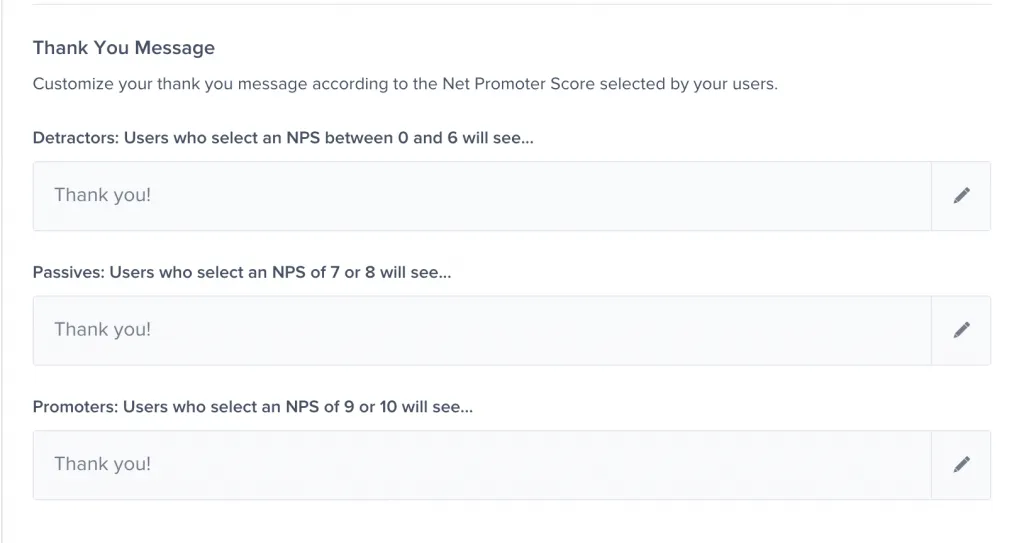
Thank you messages
You can add custom thank you messages for your respondents based on how they answer your survey. For each segment, you can specify follow-up actions — by default, your promoters will be prompted to leave you a Google Play or App Store review. This helps boost your ratings while keeping negative feedback between you and the user. Here’s where you can edit your messages and calls to action.
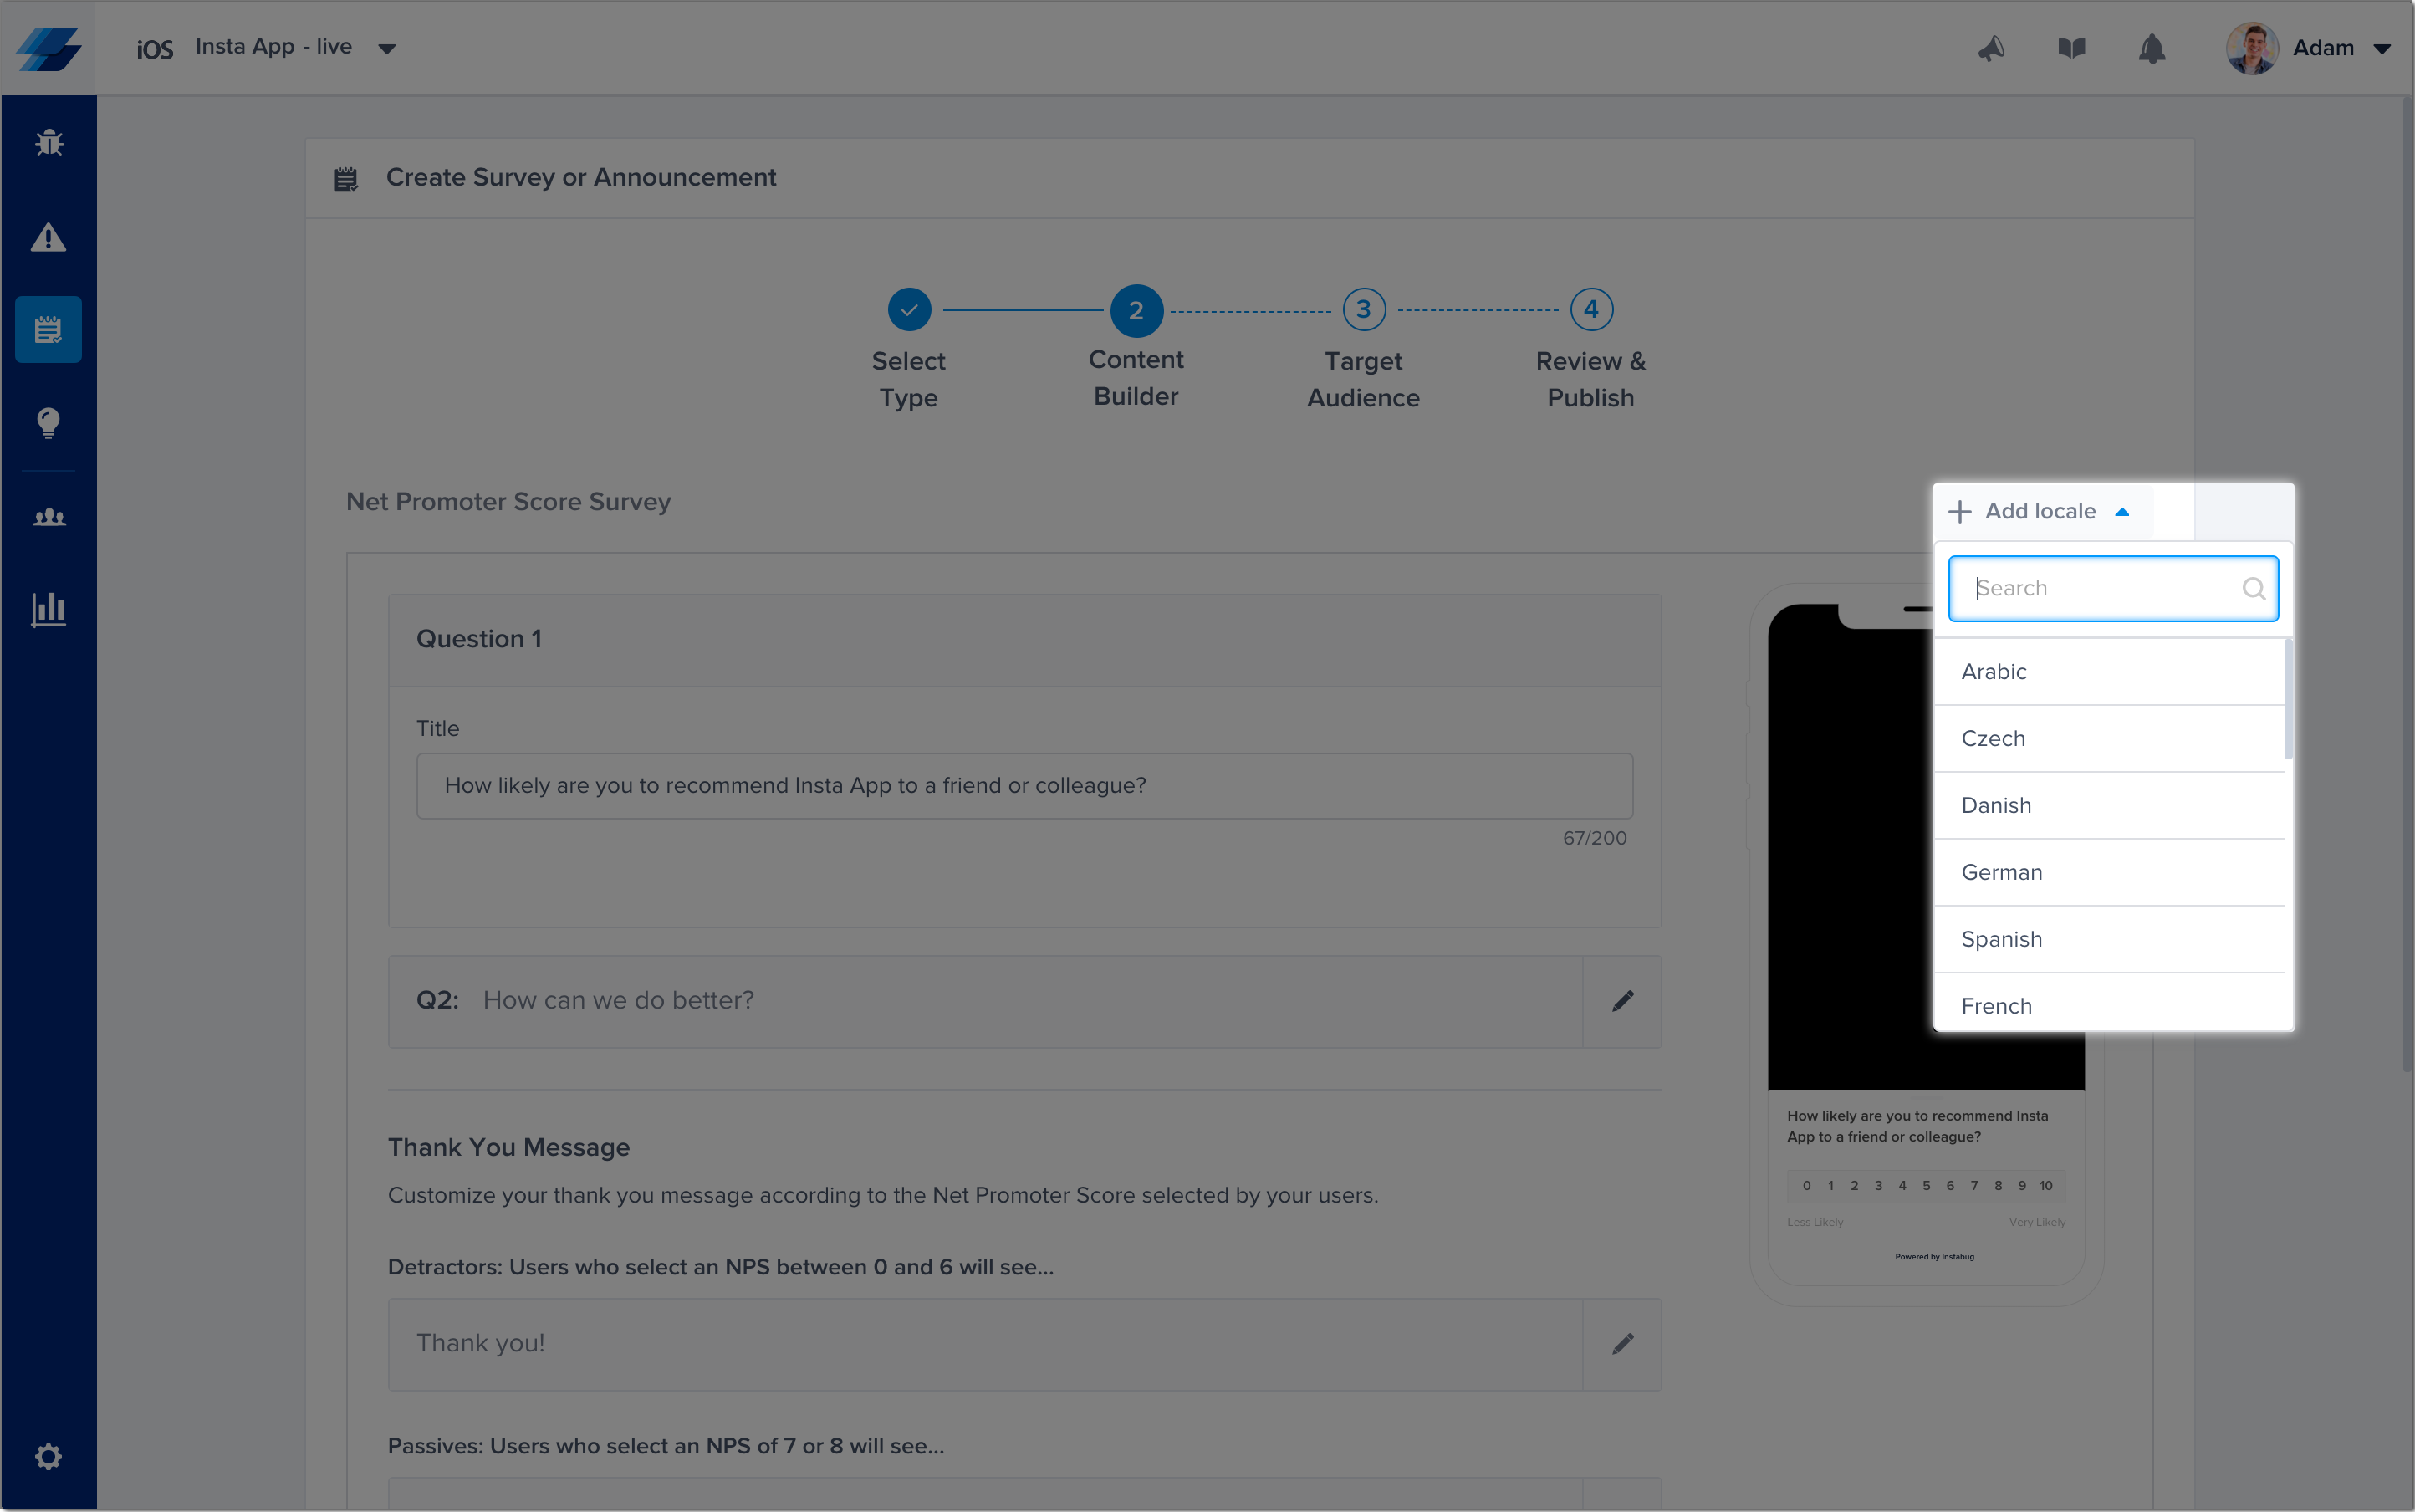
Locales
Do you have regional or international audiences? Click the Add Locale button on the top right. Select your desired locales one at a time, and they’ll populate as tabs. Since NPS question translations are already included, you won’t need to change anything unless you want to. If you’re doing a custom survey question, you’ll need to translate and add the text on your own.
If you need to take a break, you can hit Save Draft at the bottom of the page and come back to it later.
Once your content is ready, it’s time to move on and choose who’ll see your survey.
Step 3: target audience
All right, you’ve written your survey! Now it’s time to choose which users will see it.
Targeting types
- Auto targeting: Set conditions to send targeted surveys to specific user segments or at specific times. This survey type can be shipped without any code changes.
- Email targeting: Upload a CSV file of email addresses to send targeted surveys to these users.
- Manual targeting: Use a token in your code to programmatically show your survey whenever and wherever needed.

Auto targeting choices
WHO: Here’s where you pick your segment. You can choose your pre-made segments from the drop-down menu or create new custom conditions from user attributes. In this example, I’ll be sending NPS surveys to checked-out users who haven’t been around for a week or more. If desired, I can add additional conditions to get even more specific.
WHEN: By default, the survey will appear 10 seconds after the session starts. You can create custom user events if you’d prefer more strategic targeting. For example, Tinder sends NPS surveys right after the user has made a match—when the user feels happy, that’s a great time to ask for a review!
FREQ: How often do you want users to see your survey? Default is once, but if you want to run an ongoing survey, set the frequency so your segment will see it on a regular basis.
Once you’re ready, we can hit Next and move on to the last step.
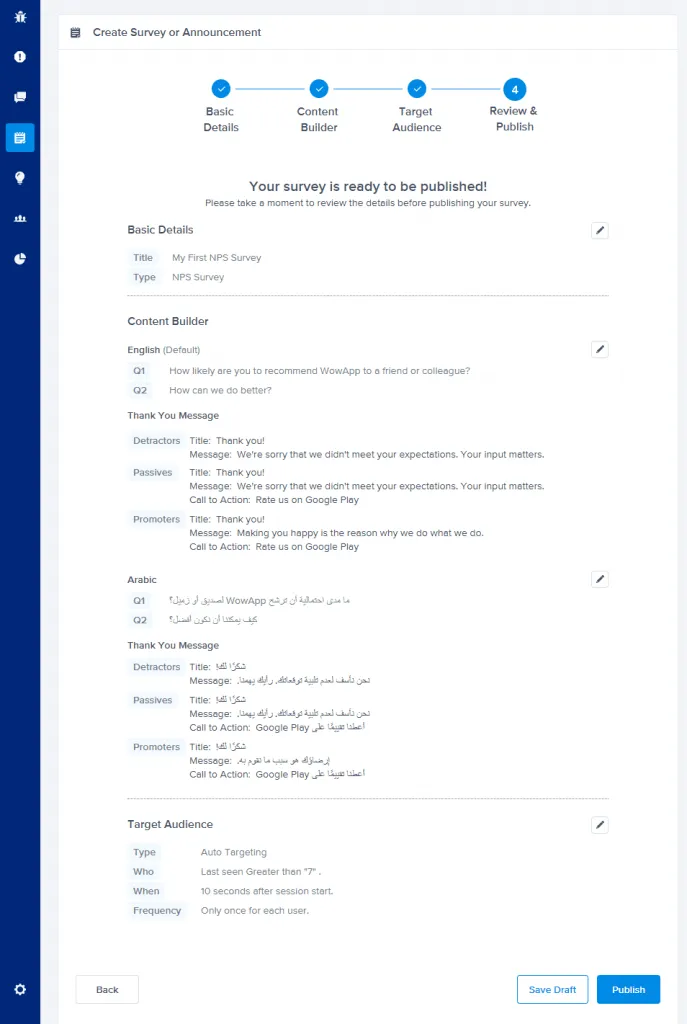
Step 4: review & publish
Here, you’ll see an overview of your survey and targeting conditions. Give it one last glance to make sure everything looks right. You can edit any part of your survey on the spot by clicking the pencil icon to the right of each section. Once you’re ready, hit Publish and you’re all set! Your targeted users will start seeing your survey.
Your survey results page
You can check in on your survey results at any time; you’ll get real-time results updated whenever you reload the page.
Summary
In the top left, you’ll find some helpful numbers: how many users saw your survey, and what percentage of those responded to it.
Analytics
Here’s where you’ll find your Net Promoter Score and a breakdown of your respondents. Hit the arrows on the left or right to cycle through more data. The word cloud shows you the approximate frequency words are used in the qualitative responses, with the most-used words appearing the largest. On the next tab, you’ll see what percentage of respondents went to the App Store or Google Play to rate your app.
Target
The Target box on the top right will give you a quick breakdown of your survey type and targeting conditions.
Responses
Here’s where you can check out all your individual responses. To filter responses, you can type your query into the search bar at the top, or select criteria from the dropdown menus below.
Click on the user’s email address on the left to be taken to their user page, where you can learn more about them, see if they’ve submitted any bug or crash reports, or had any conversations with you in the past.
Back to the results page—your user’s NPS response and answers are displayed next to their email address. Their locale and last seen dates appear toward the right side of the row.
An essential feedback best practice is closing the loop. To ask follow-up questions or simply thank the user for participating, you can press the Reply button on the right side of the screen to get in touch and start a chat.
If you’d like to hide an individual survey response, you can do so by pressing Close. If you accidentally closed a response and want to see it again, it’s easy to get them back. Click Status in the filter section and select Closed. Your closed responses will reappear, and you can reopen them at any time.
Exporting your survey responses
It’s easy to get your survey results collapsed and packaged into one convenient file. In the top left of the survey responses section, you’ll see a button that says Export Filtered Responses. Just click it to have a CSV file of your responses sent to your email address.
And that’s it! You’ve now designed, shipped, and analyzed your first survey!
Survey design resources
You now know all the basics of shipping surveys with Instabug. But there’s always more to learn when it comes to writing questions, choosing your segments, and targeting effectively. Our blog is packed with resources to help you write great surveys. Check them out below to get started:
Customizing your Instabug surveys
Writing survey questions
Survey targeting
- How to Segment App Users for Max Survey Feedback
- How to Target Audiences With Instabug's In-App Surveys
NPS surveys
Survey results
Want to try our latest AI features?
Sign up to the closed beta now
Oops! Something went wrong while submitting the form.
Instabug empowers mobile teams to maintain industry-leading apps with mobile-focused, user-centric stability and performance monitoring.
Book a demo to see how Instabug can help your app


